- Cloud Migration via rclone
Cloud Migration via rclone
Move your data from other cloud storage providers easily to IDrive e2 object storage using rclone. Transfer large unstructured data including media files, backup folders, etc., to IDrive e2 object storage.
If your data is large, then IDrive e2 offers a cloud server with unlimited bandwidth to migrate from your current cloud storage provider to IDrive e2 free of cost.
Once you get the server access details from IDrive e2, follow the below rclone document for cloud migration.
Use rclone to move data to IDrive® e2 object storage
To move data to IDrive e2 cloud storage,
- Install rclone. You can install rclone either for all users on a system or for a single user.
- Configure object storage to use the Amazon S3 Compatibility API. You will also need to test your connection to Object Storage.
- Configure your source. This means you export your source path as an environment variable and depends on the source you are using.
- Transfer the data and verify the transfer.
Install rclone
You can install rclone either for all users on a system or for a single user.
System-wide rclone installation
You require administrative privileges to install rclone across your system.
- On IDrive e2 Linux 7, install rclone by using yum:
$ sudo yum install -y rclone
sudo yum install -y rclone
 Click to copyCopied
- On other Linux distributions, use the installation script provided by rclone.
Download and run that script to install the latest version of rclone
system-wide:
$ curl https://rclone.org/install.sh | sudo bash
curl https://rclone.org/install.sh | sudo bash
 Click to copyCopied
rclone installation for individual use
If you do not have administrative privileges or do not want to install rclone system-wide, you can download the latest binary and use it directly.
Use the following string of commands to download rclone, create a /bin directory in your home folder, and add it to your PATH environment variable:
                                        $ mkdir ~/Temp

                                        $ cd ~/Temp/

                                        $ curl -O https://downloads.rclone.org/rclone-current-linux-amd64.zip

                                        $ unzip rclone-current-linux-amd64.zip

                                        $ cd rclone-*-linux-amd64

                                        $ mkdir ~/bin

                                        $ cp rclone ~/bin/

                                        $ export PATH=$PATH:~/bin

                                        $ echo 'export PATH=$PATH:~/bin' >> ~/.bashrc # Optional, only if you want to add it to
                                        your path at every login
                                        mkdir ~/Temp

                                        cd ~/Temp/

                                        curl -O https://downloads.rclone.org/rclone-current-linux-amd64.zip

                                        unzip rclone-current-linux-amd64.zip

                                        cd rclone-*-linux-amd64

                                        mkdir ~/bin

                                        cp rclone ~/bin/

                                        export PATH=$PATH:~/bin

                                        echo 'export PATH=$PATH:~/bin' >> ~/.bashrc # Optional, only if you want to add it to
                                        your path at every login
Note: PATH is reset when you log out unless you put it to your .bashrc
Configure rclone for object storage
To configure rclone for IDrive e2 object storage, you must use the Amazon S3 Compatibility API. First, you need to obtain proper credentials and the API endpoint and then set the correct environment variables. Here are the instructions:
Obtain security credentials and API endpoint
Access Keys can be generated from the Access Keys tab of the IDrive e2 account.
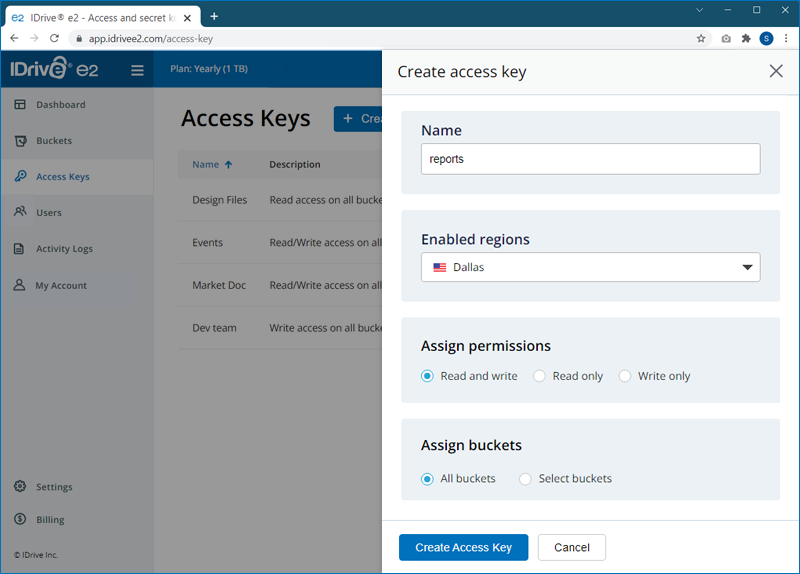
To create a S3 Access Key,
- Sign in to the IDrive e2 account.
- Click on the Access Keys tab.
- Click Create Access Key.
- Enter a name for the access key and select a region from the list of
enabled regions in the dropdown list.

- Select the access permission for the access key.
- Select the buckets to be accessed using the access key.
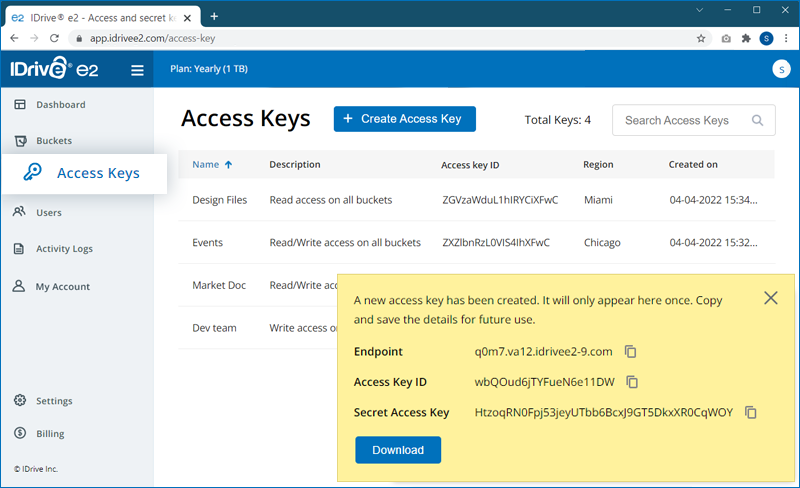
- Click Create Access Key. An Access Key ID and Secret
Access Key will be generated. Download/copy to save the details.
Access Key roles and rights cannot be edited. To edit access roles or access rights to buckets, delete the Access Key and create a new one.
rclone configuration
After you have your secret key, access key, API endpoint, configure rclone by setting these values in the rclone configuration file.
To set the values,
- Use the following commond to display the rclone config file path:
rclone config file
 Click to copyCopied
- Add the following configuration for source and destination (IDrive e2)
to the rclone config file:
[e2]

                                                        type = s3

                                                        provider = IDrive

                                                        env_auth = false

                                                        access_key_id = <your e2 access key>

                                                        secret_access_key = <your e2 secret key>

                                                        endpoint = <your e2 endpoint>
Click to copyCopied
[source]

                                                    type = s3

                                                    provider = Other

                                                    env_auth = false

                                                    access_key_id = <your cloud s3 provider access key>

                                                    secret_access_key = <your S3 secret key>

                                                    endpoint = <your S3 endpoint>
Click to copyCopied
IMPORTANT NOTE: If default encryption is enabled on IDrive e2 for the bucket, you may receive MD5 errors when uploading. As long as you are using the default encryption key (default behavior when enabled), your rclone config can add the following line: server_side_encryption = aws:kms
Move your data to IDrive® e2 cloud storage
Once the environment variables are set, follow the steps below to move your data to IDrive e2
- Use the following command to verify that rclone recognizes the
configuration:
rclone listremotes
 Click to copyCopied
The expected output:

- Create a target bucket in IDrive e2 wherein the data will be copied
- Run the following command to copy data to IDrive e2. Replace source-bucket
with source bucket name and target-bucket with the
target bucket created in IDrive e2
rclone copy --verbose source:source-bucket e2:target-bucket
 Click to copyCopied
Other approaches and tools for migration
Migrating data from other cloud providers to IDrive e2 cloud object storage platform is quite easy. The storage is S3 compatible hence you can use it with your existing tool or process without any additional software.
Methods
You can select from any of the following alternative options for data migration:
- Self-hosted Cloud Migration by connecting your current cloud provider to IDrive e2 via a tool that is hosted by your organization.
- Source Data Migration by moving data directly to e2 storage from the source, without involving your current cloud provider.
Supported migration tools
This section provides a list of common migration tools that can be used with IDrive e2.
| Cloud hosted tools | Self hosted tools |
|---|---|
| Flexify.io | AWS CLI |
| Couchdrop | Datadobi DobiMigrate |
| Cloudflyer | NetApp CloudSync |
| CloudFuze | Nodeum |
| Cloudsfer | Scality Zenko |
| S3cmd |
