Account management
To create an account,
- Sign in to your IDrive® CRM account.
- Navigate to Accounts and click Create Account.
- Click
 and upload or simply drag and drop to add an image.
Note: You can only upload images under 15 MB with .png, .jpg, and .jpeg extensions. - The account owner will be defined by default. To change the default account owner, click
 and choose a user from the dropdown list or create a new user.
 - Select an account name.
- Select an account type, business status, ownership type, and business category from the dropdown menu. Enter the email, phone, mobile, website, and LinkedIn account. These fields are optional.
- Add Address information.
- Add any extra information under Description.
- Click Save to create the account. On successful creation of the account, it will be listed on the Accounts page.
Alternatively, click Save and New if you want to create the account and open a new create account form simultaneously.
To customize a field or add new fields to the form, click the Customize fields button.
Note: You can also import your existing accounts in CSV and Excel file formats.
Yes, you can import up to 5000 account records from your computer to your account in CSV and Excel formats.
To import accounts,
- Sign in to your IDrive® CRM account.
- Navigate to Accounts.
- Hover on the Create Account dropdown button and click Import Accounts.
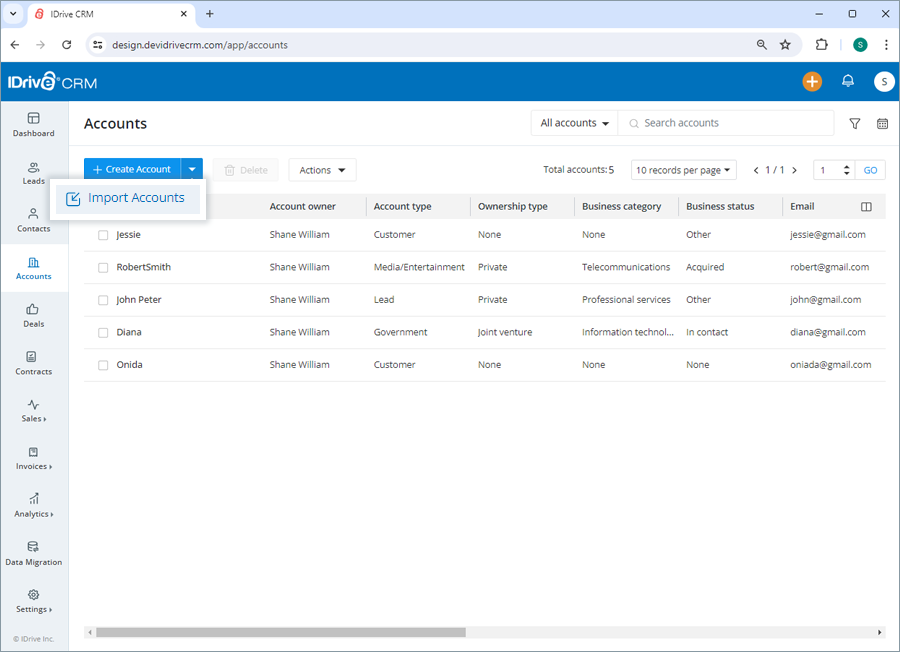
- Upload or simply drag-and-drop the files to import.
Note: You can only import files with .csv, .xlsx, and .xls extensions under 15 MB. - Click Import.
To edit an account,
- Sign in to your IDrive® CRM account.
- Navigate to Accounts.
- Hover on the account you want to edit and click
 .
.
The edit account screen will appear.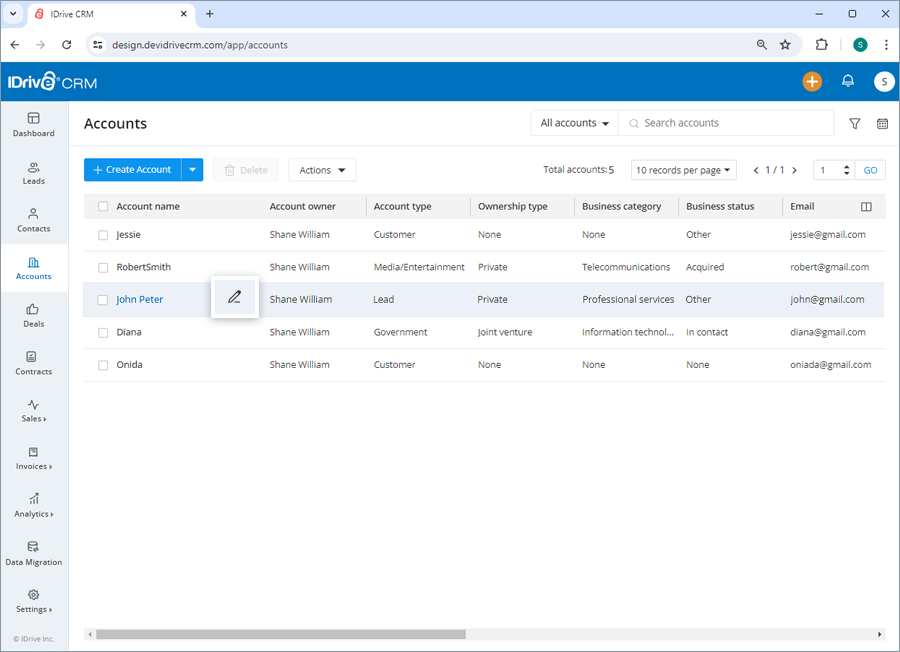
- Modify the details as required.
- Click Save to save changes.
Click ![]() to access the view pane. The updated account information will be displayed on the screen. You can make further changes to the account information by clicking the Edit button.
to access the view pane. The updated account information will be displayed on the screen. You can make further changes to the account information by clicking the Edit button.
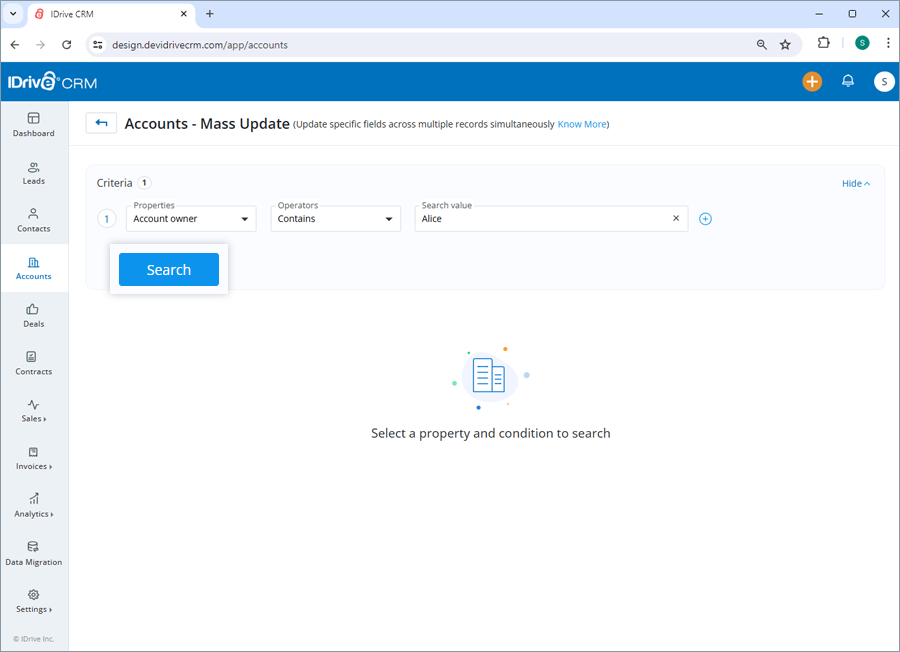
Yes, you can mass update the values for specific fields across multiple records for an account simultaneously.
To perform mass update for an account,
- Sign in to your IDrive® CRM account.
- Navigate to Accounts.
- Click Mass Update from the Actions dropdown menu.
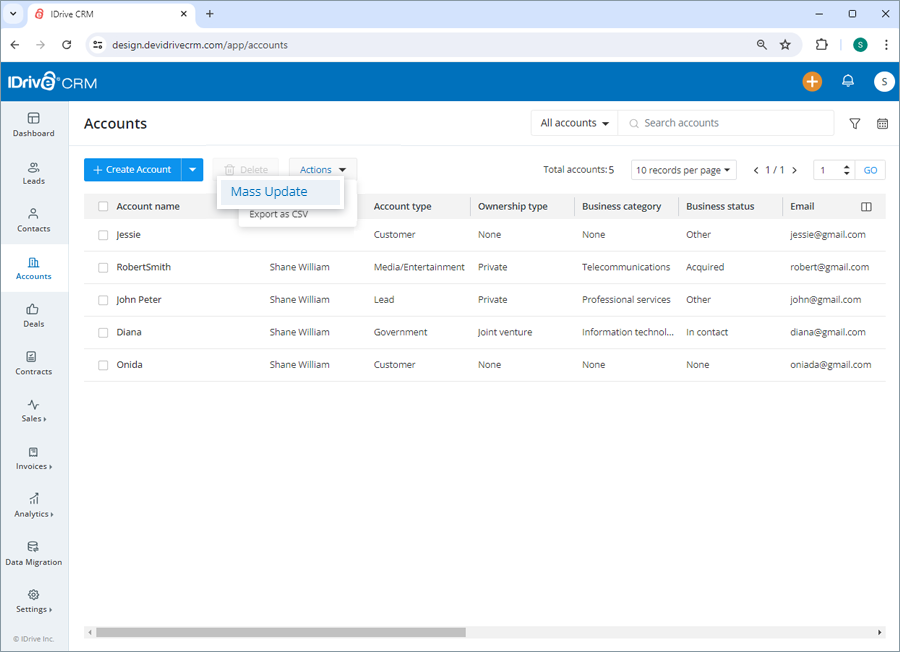
- Filter the accounts as per the required criteria and click Search.
- Select the accounts that you want to update and click Mass Update.
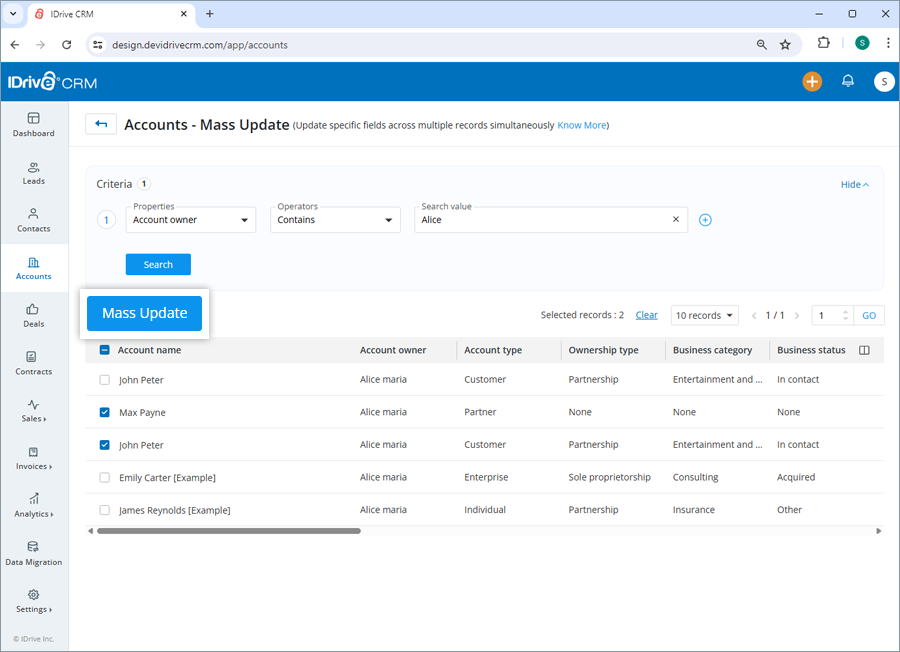
- Select the property and enter the modified values for the selected property under Update value.
- Click Update.
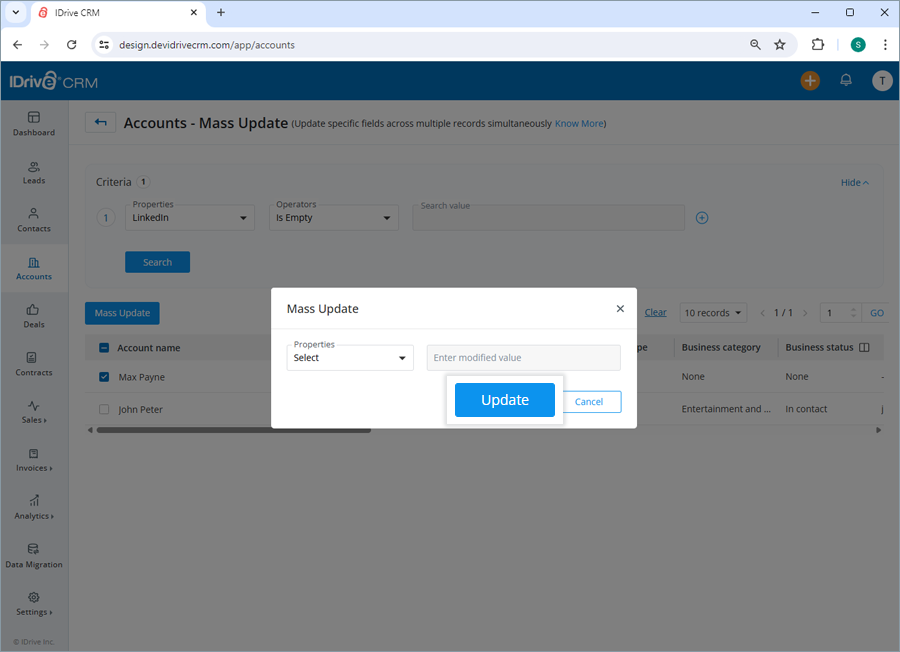
Similarly, you can also mass update the value of specific fields across multiple accounts in one go
You can view and edit account information, clone, and delete the account by clicking the respective buttons on the view pane. You can also view the following:
- Info - View account information.
- Note - Add and save a note for reference.
- History - View the associated activity logs.
To open the view pane for a particular account, click anywhere on the account row.
Yes, you can create a clone of an account.
To clone an account,
- Sign in to your IDrive® CRM account.
- Navigate to Accounts.
- Click anywhere on the account you want to clone. The view pane will appear.
- Click
 and select Clone from the dropdown.
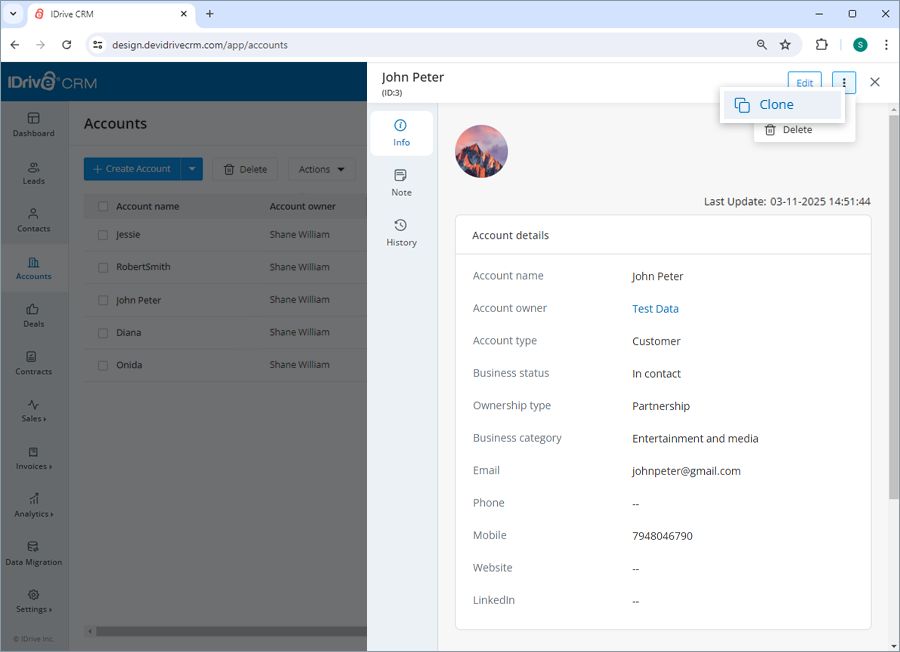
- Make changes to the account details.
- Click Clone.
You can export up to 5000 account records from your IDrive CRM account to your computer using a CSV file. Contact support to export records of larger volumes.
To export an account detail,
- Sign in to your IDrive® CRM account.
- Navigate to Accounts.
- Select the account for which you want to export the details.
- Click Export as CSV from the Actions dropdown. A popup window will appear.
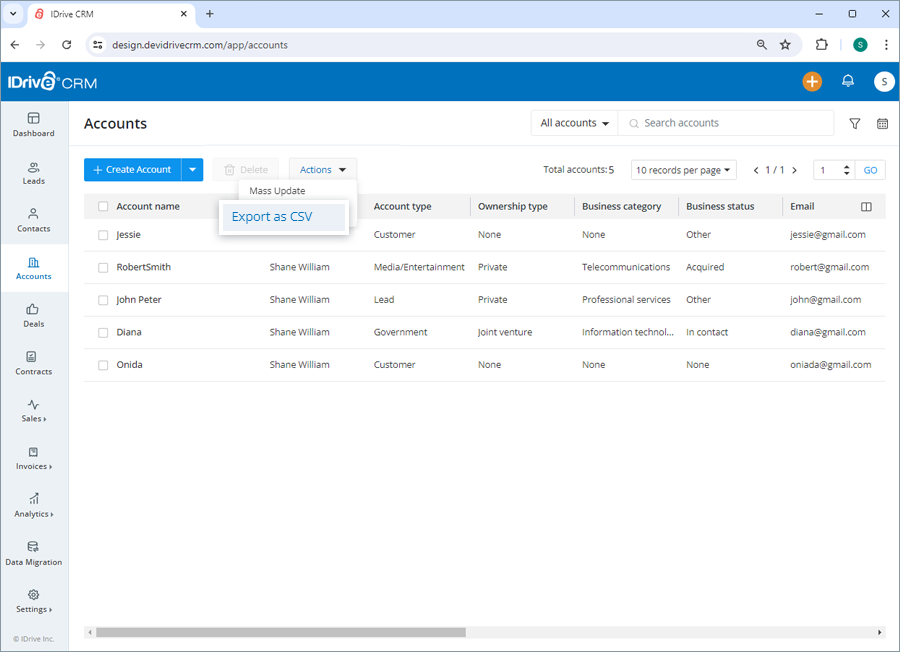
- Select Applied filters to generate records with the applied filters. Alternatively, select First 5000 records to set the data range to generate records.
- Click Export. The data will be downloaded on your computer in CSV format.
To delete an account,
- Sign in to your IDrive® CRM account.
- Navigate to Accounts.
- Select the account that you want to delete.
- Click
 .
.
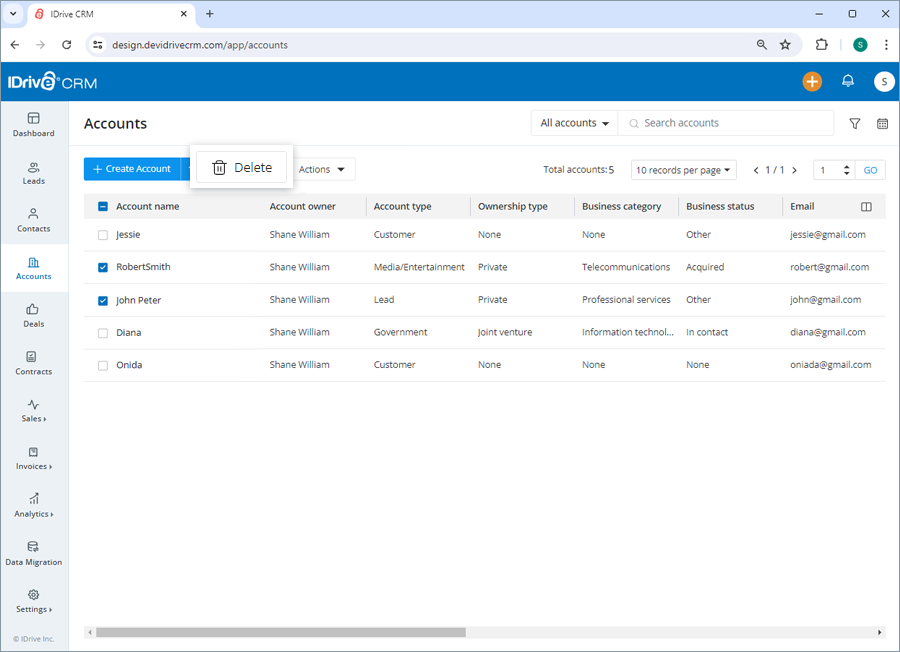
- Click Delete in the confirmation popup.
Note: Deleting an account will also permanently delete the associated activities.
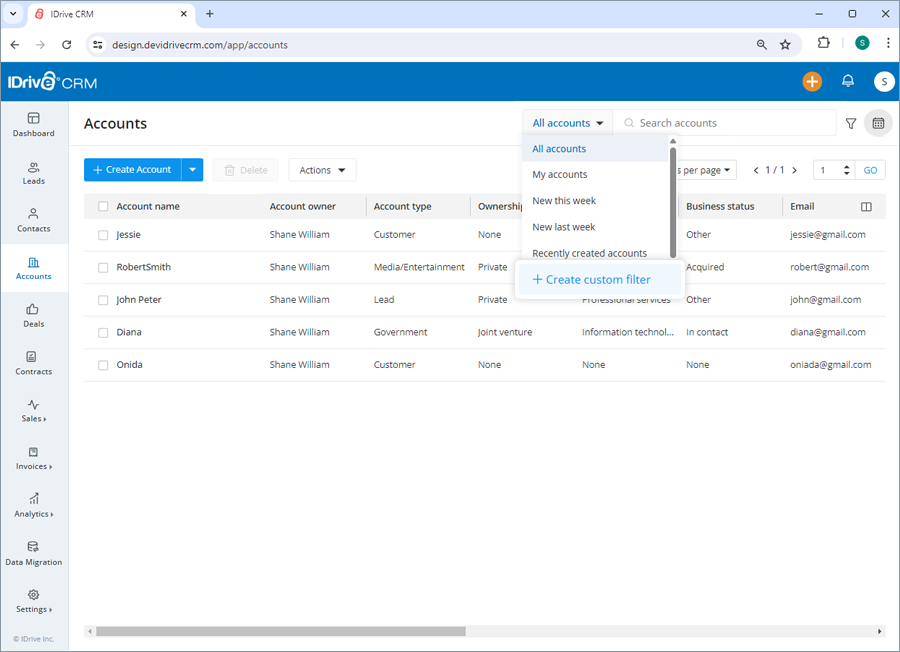
To find all your recently added accounts,
- Sign in to your IDrive® CRM account.
- Navigate to Accounts.
- Click the dropdown button.
- Select Recently created accounts from the dropdown menu.
A list of all the recently created accounts will be displayed on the screen.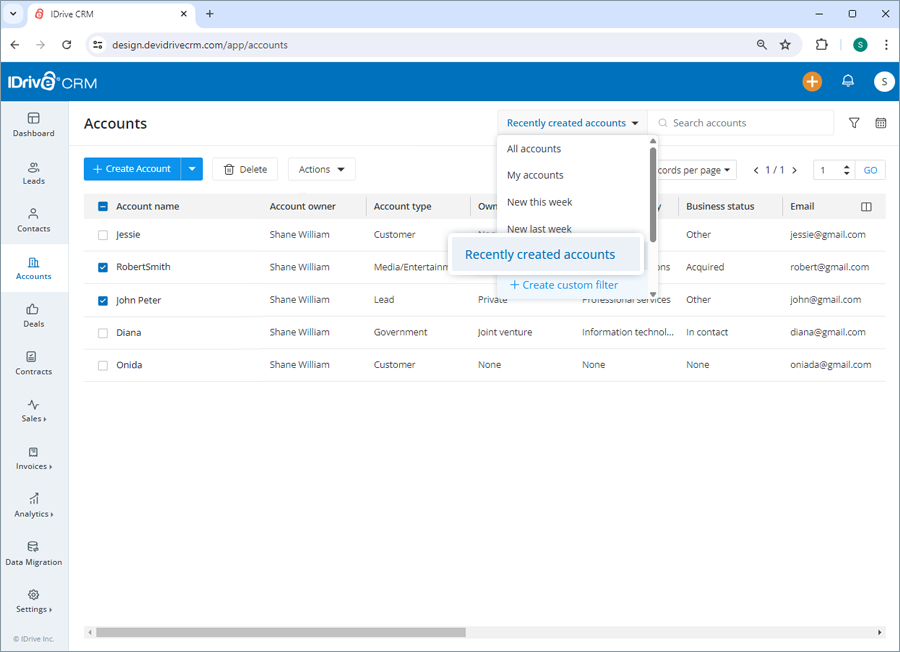
Alternatively, to view the following select the respective buttons:
- All accounts - all the accounts in your IDrive® CRM account
- My accounts - all your accounts
- New this week - all the accounts created/imported in the recent week
- New last week - all the accounts created/imported last week
- Recently modified accounts - all the accounts modified recently
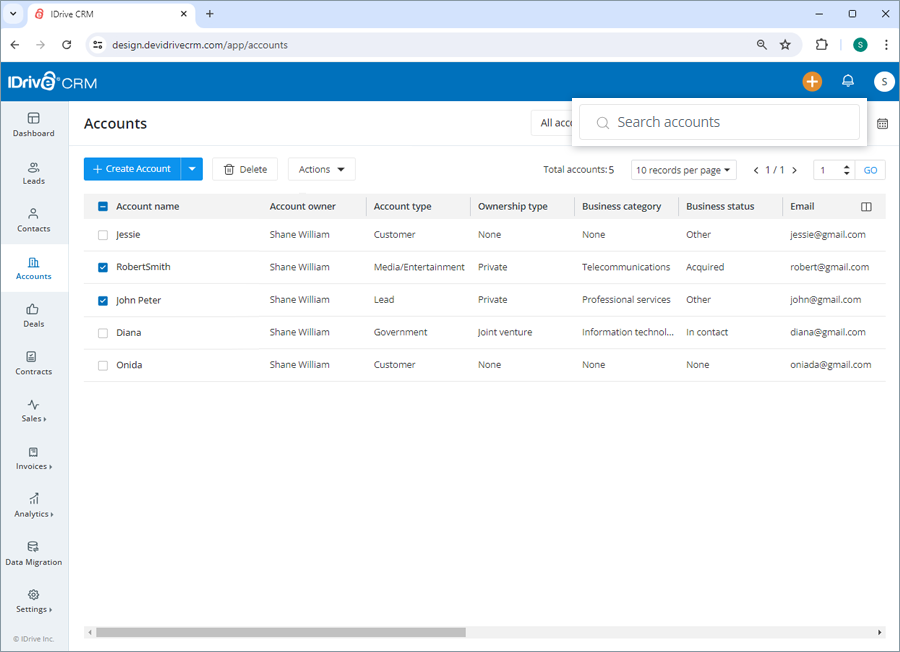
Yes, you can search for a specific account.
To search an account,
- Sign in to your IDrive® CRM account.
- Navigate to Accounts.
- Enter the account name in the Search accounts field. All the accounts matching the search term will be displayed on the screen.
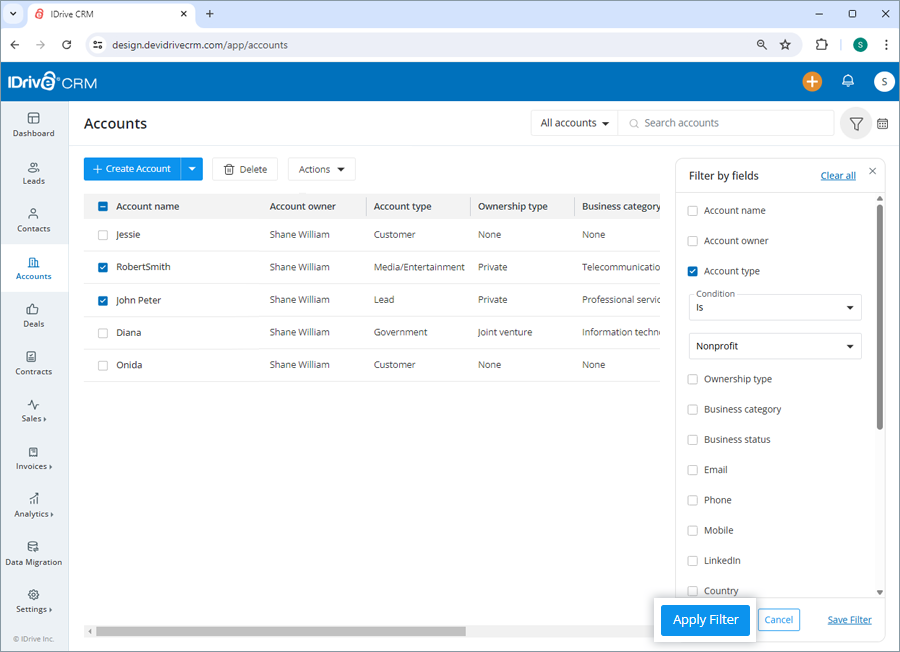
To filter account by a field such as name, type or any other column heads,
- Sign in to your IDrive® CRM account.
- Navigate to Accounts.
- Click Custom filters.
- Select the filter that you want to apply from the Filter by fields dropdown list and set the attribute values.
- Click Apply Filter. Click Clear all to remove all the selected filters.
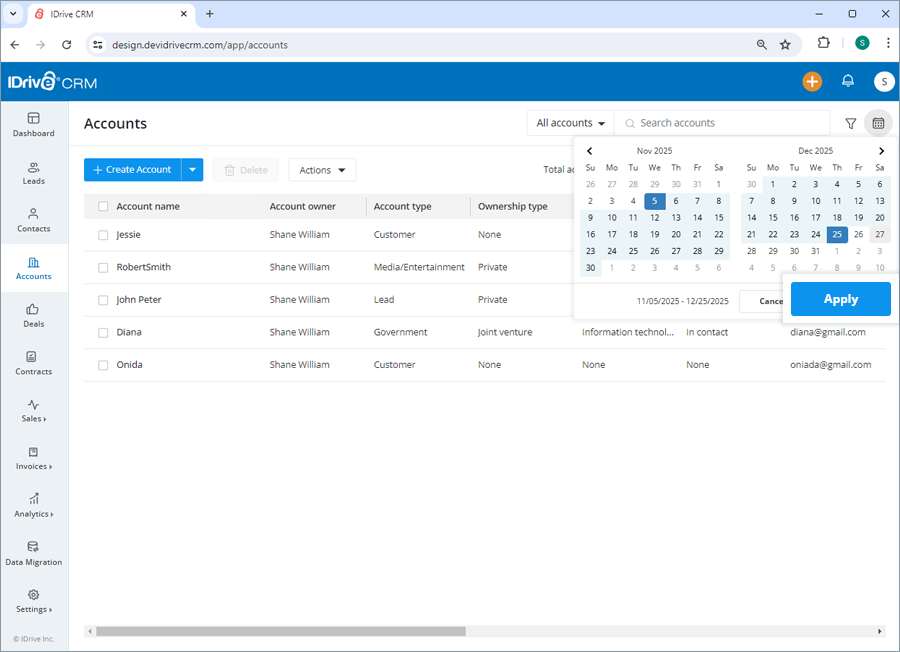
To filter accounts by time,
- Click Date filter.
- Select the filter that you want to apply from the dropdown menu.
- If you wish to customize the time period for search, click Custom range and set a specific date range on the calendar.
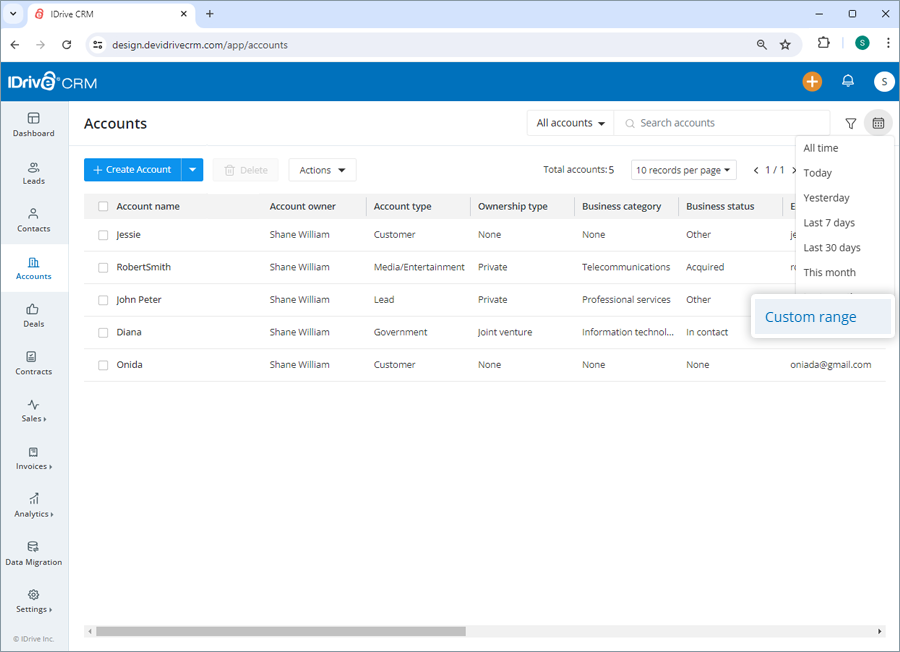
- Click Apply. A list of all the accounts created/imported within that specific time period will be displayed on the screen.
You can also filter the number of records to be displayed on the page by selecting the desired option from the records per page dropdown.
Yes, you can create custom filters for accounts.
To create a custom filter,
- Sign in to your IDrive® CRM account.
- Navigate to Accounts.
- Click the dropdown button and then click Create custom filter.
- Select the filter that you want to apply from the Filter by fields dropdown list and set the attribute values.
- Click Apply Filter.

To save the filter,
- Click Save Filter to add the filter to your list of custom filters.
- Enter a name for the filter and click Save.
The filter will be added to the list of custom filters.
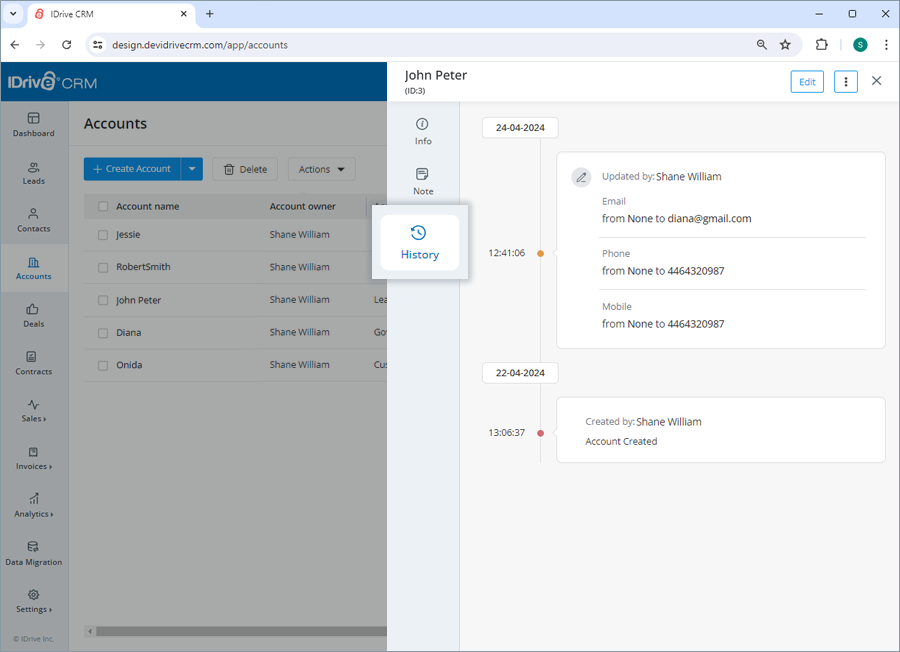
To view the activities associated with an account,
- Sign in to your IDrive® CRM account.
- Navigate to Accounts.
- Click anywhere on the account for which you want to view history. The view pane will appear.
- Click History. A list of all activities associated with the account will be displayed, along with their timestamps.