Settings
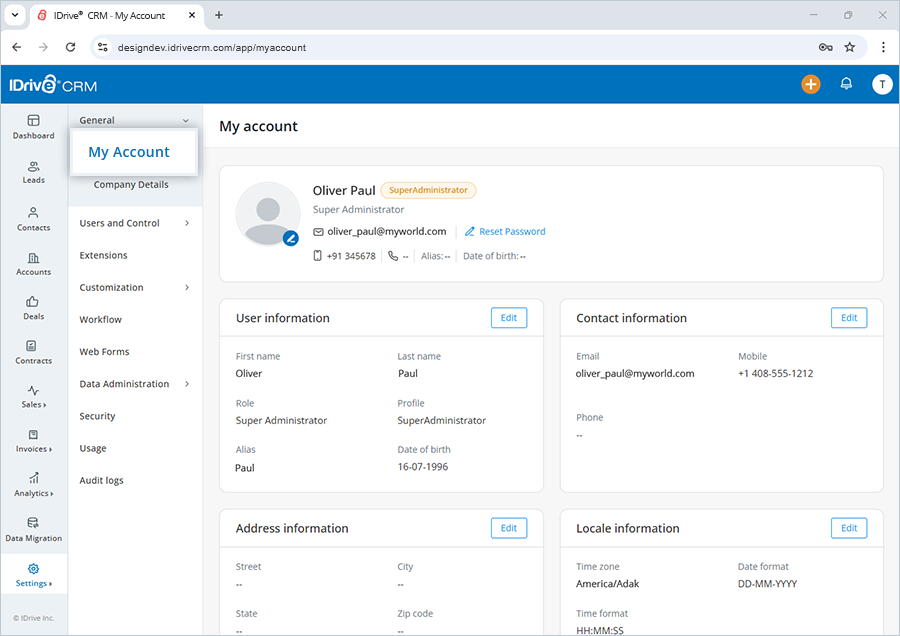
You can edit your personal information such as name, role, alias, date of birth, contact details, address, and location at any time.
To edit your personal information,
- Sign in to your IDrive® CRM account.
- Navigate to Settings. The My Account page will open under General.
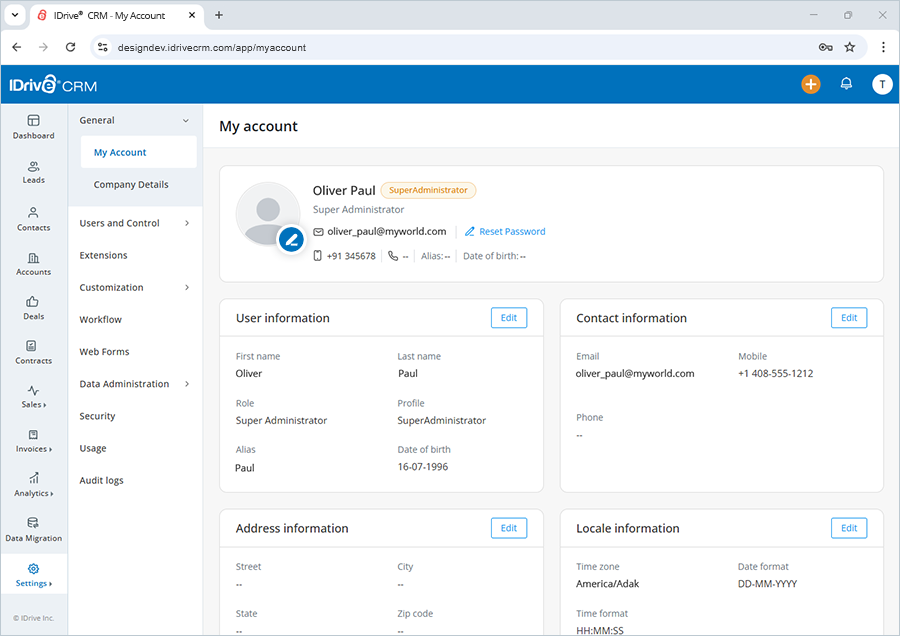
- Click
 in the image upload field if you want to upload an image.
- Click Edit corresponding to User information, Contact information, Address information, and Locale information to make changes in the respective sections.
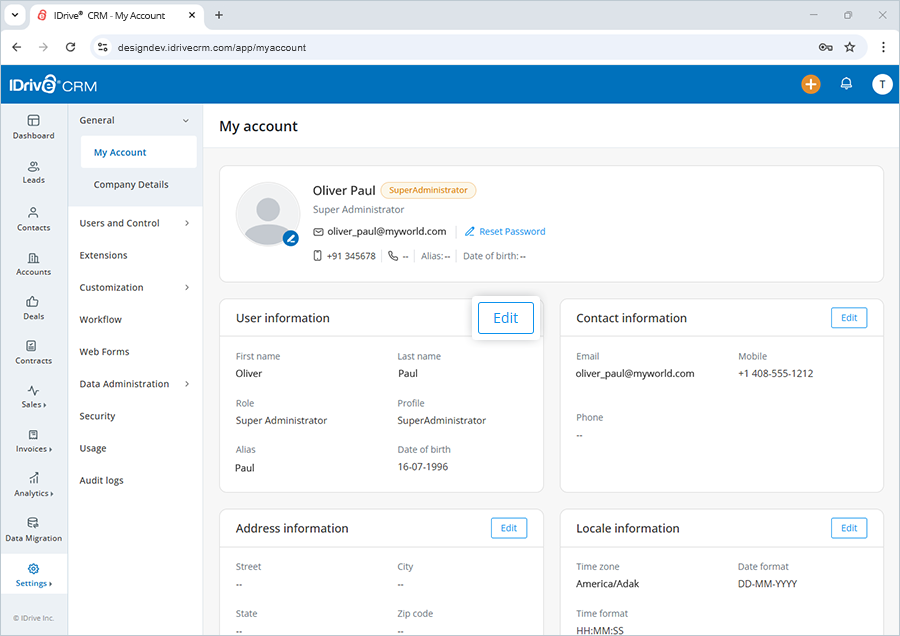
- Enter the information as required.
- Click Save to save the changes.

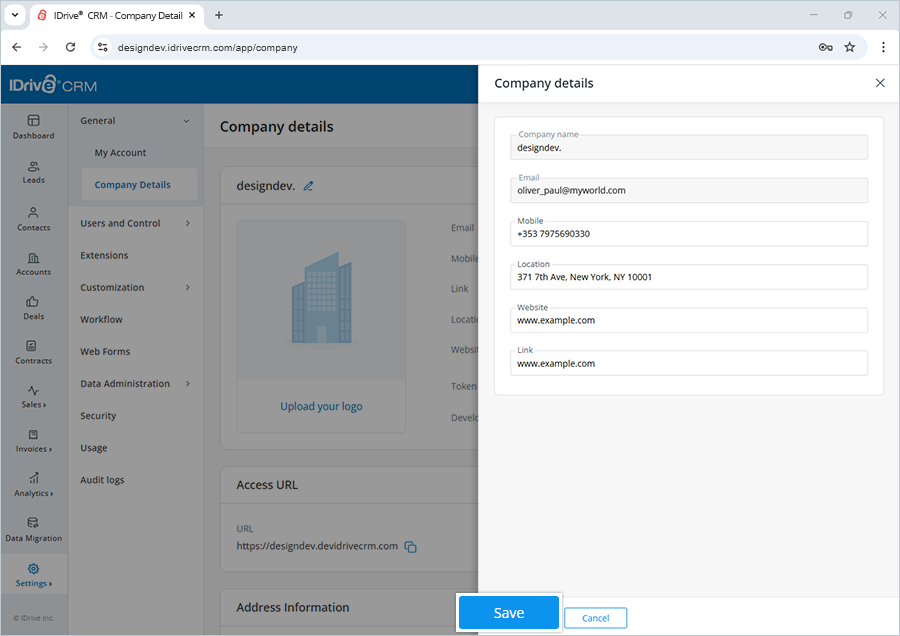
Yes, admins can edit the company details such as email address, mobile number, location, address, website, and access URL at any time.
To edit your company details,
- Sign in to your IDrive® CRM account.
- Navigate to Settings and click Company Details under General.
- Click Upload your logo to upload or drag-and-drop an image from your computer.
- Click
 corresponding to the company name to update the company details.
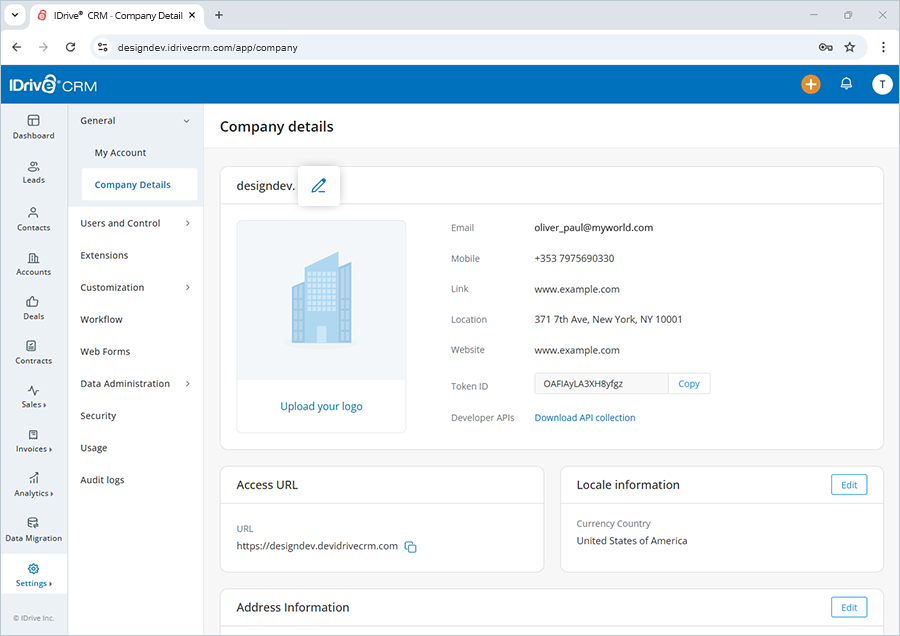
- Click Edit corresponding to Locale information and Address information to make changes in the respective sections.
- Enter the information as required.
- Click Save to save the changes.
- Click Upload your logo to upload or drag-and-drop an image from your computer.
Yes, the admin can configure a Gmail, Microsoft 365, and Yahoo service for sending emails. Besides the default email services, you can configure any other email service of your choice.
To configure an email service,
- Sign in to your IDrive® CRM account.
- Navigate to Settings and click Company Details under General.
- Select the required email service under Mail configuration.

- Sign in to your email account using the credentials.
- Click Allow on the permission screen. Once authorized, the email address will be configured to your IDrive® CRM account.
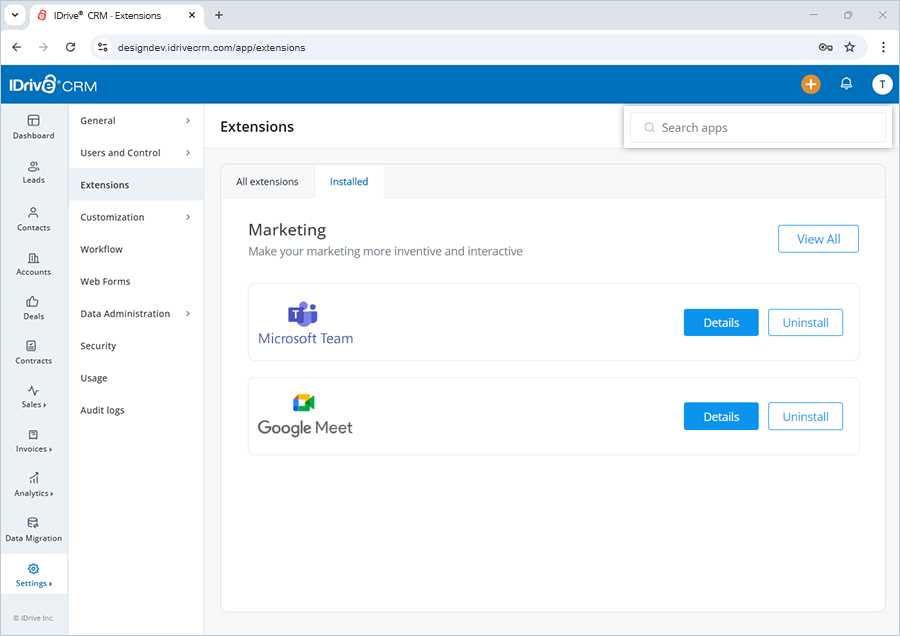
IDrive® CRM offers a range of meeting, messaging, emailing, and marketing extensions that can be easily integrated with your IDrive® CRM account for effective sales and customer management. Sign in to your IDrive® CRM account and navigate to Extensions to view all the default options.
- Sign in to your IDrive® CRM account.
- Navigate to Settings and click Extensions.
- Click Installed.
A list of all the extensions under that category will be displayed on the screen.
To view all the extensions available in your account, go to All extensions.
Yes, you can search for a specific extension in your account.
To search a group,
- Sign in to your IDrive® CRM account.
- Navigate to Settings and click Extensions.
- Enter the application name in the Search apps field.
All the applications matching the search term will be displayed on the screen.
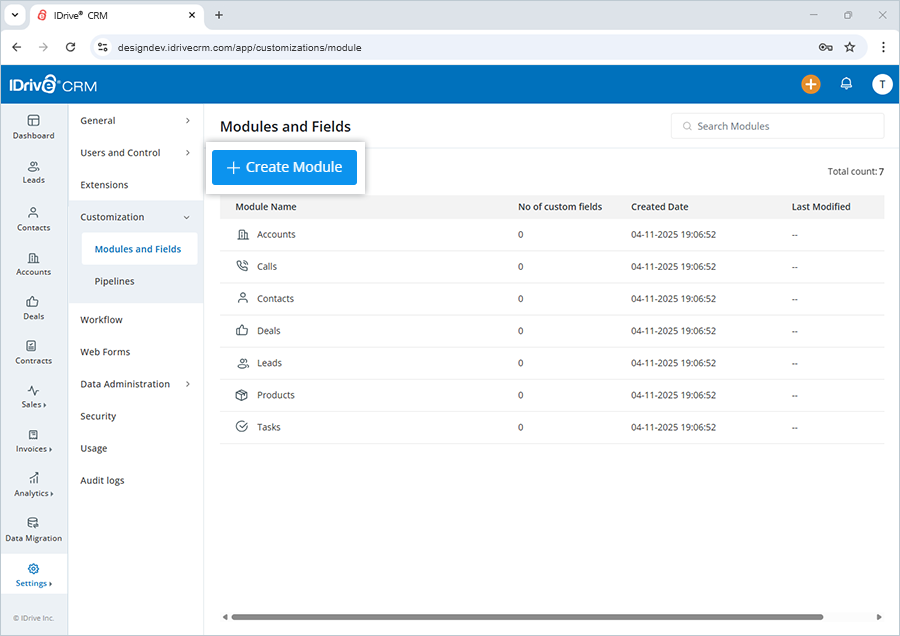
Yes, you can create custom modules with a default or a custom profile.
To create a custom module,
- Sign in to your IDrive® CRM account.
- Navigate to Settings and click Modules and Fields under Customization.
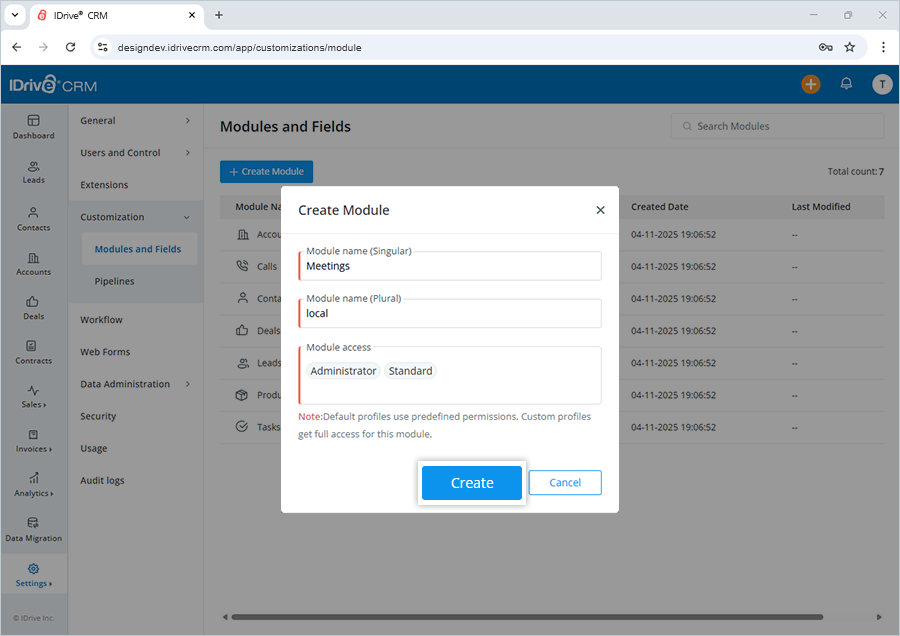
- Click Create Module.
- Enter the module name in both Singular and Plural.
-
Select a module access type.
Note: The default Administrator and Standard profiles will use predefined permissions for the module, while custom profiles will have full access to it. - Click Create. The Customizations screen will open.
- Drag and drop the required field from Custom fields to New section.
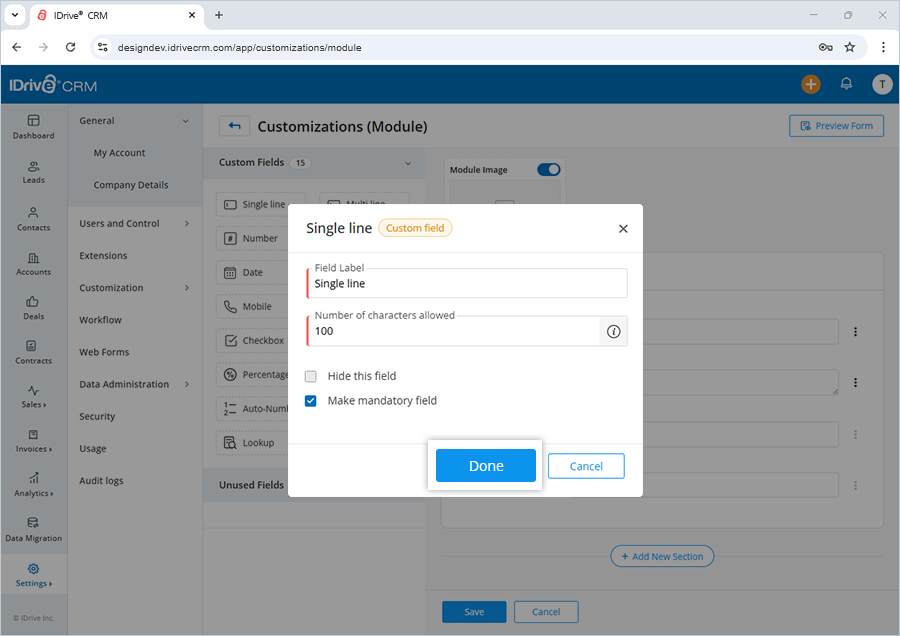
The Create a custom field screen will appear. - Enter a Field label.
- Specify the character limit for the fields.
Note: Maximum 255 characters are allowed. - Set the attribute values as needed.
- Select the checkboxes to hide the field or make it mandatory.
- Click Done to create the field.
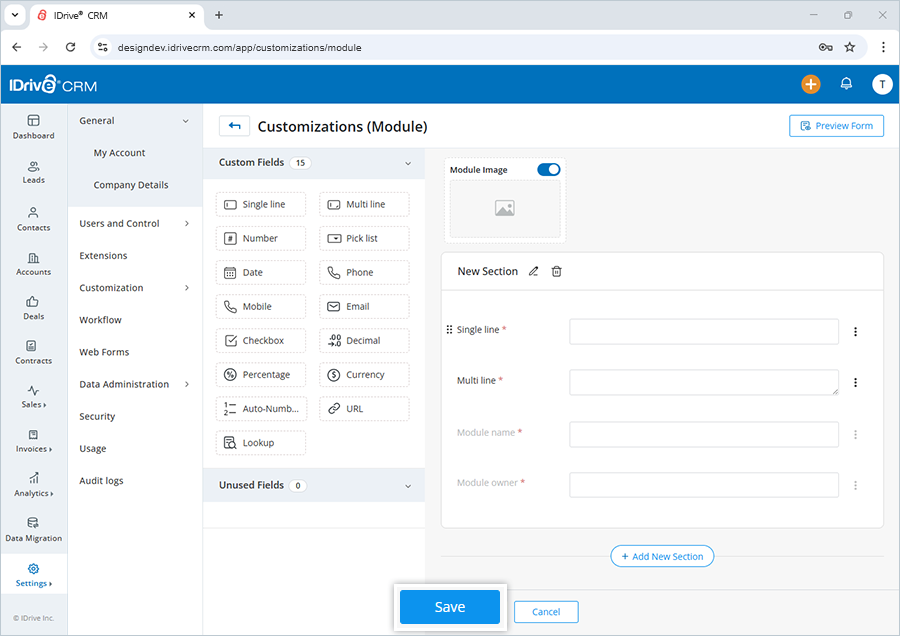
- You can also add an image for the module or hide the image section if not required.
A message will appear once field creation is processed. - Click Preview Form to view a preview of the created module.
- Click Save to add this module to the list of custom modules.
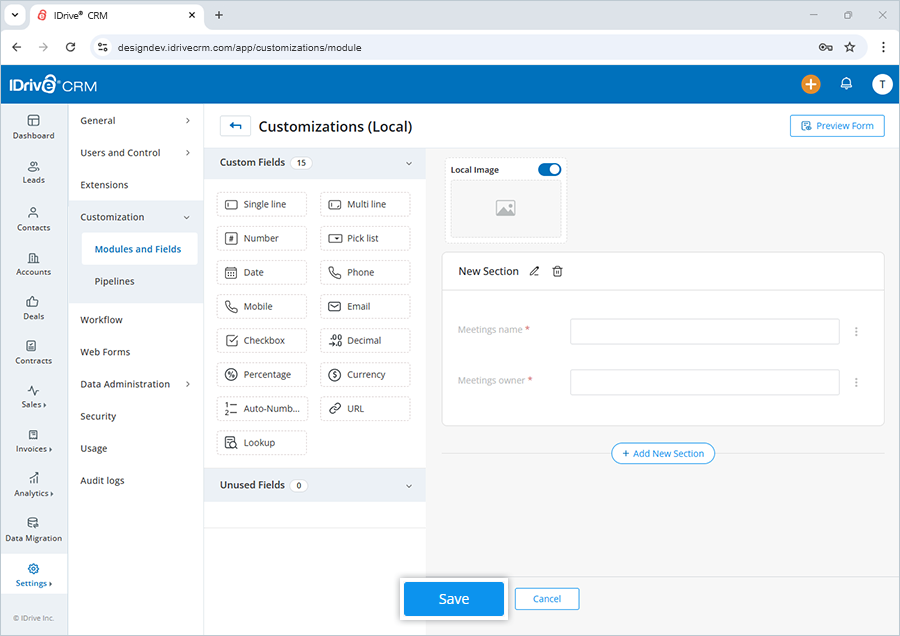
Once created, a new tab My Modules will be added to the main menu of your IDrive CRM web console, and the custom modules will appear under that.
Yes, you can create custom fields for Leads, Deals, Accounts, Contacts, Products, and Tasks modules.
To create custom fields,
- Sign in to your IDrive ® CRM account.
- Navigate to Settings and click Modules and Fields under Customization.
- Click the module for which you want to create custom fields.
- Click Customize. The Customizations screen will open.
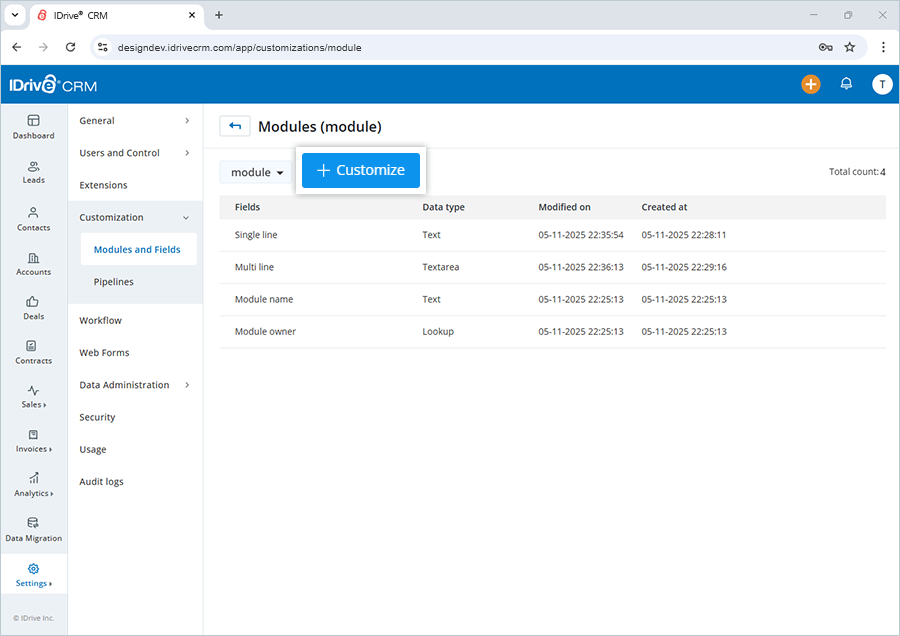
- Drag and drop the required field from Custom fields.
The Create a custom field screen will appear. - Enter a Field label.
- Specify the character limit for the fields.
Note: Maximum 255 characters are allowed. - Set the attribute values as needed.
- Select the checkboxes to hide the field or make it mandatory.
- Click Done to create the field. A message will appear once field creation is processed.
- Click Preview Form to view a preview of the created field.
A success message will appear once the field is created. Click Save to save the custom field.
The custom field will be added under the Fields section of the selected module.
Yes, you can edit both default and custom fields anytime.
To edit a field,
- Sign in to your IDrive® CRM account.
- Navigate to Settings and click Modules and Fields under Customization.
- Click the module for which you want to edit fields.
- Click Customize. The Customizations screen will open.
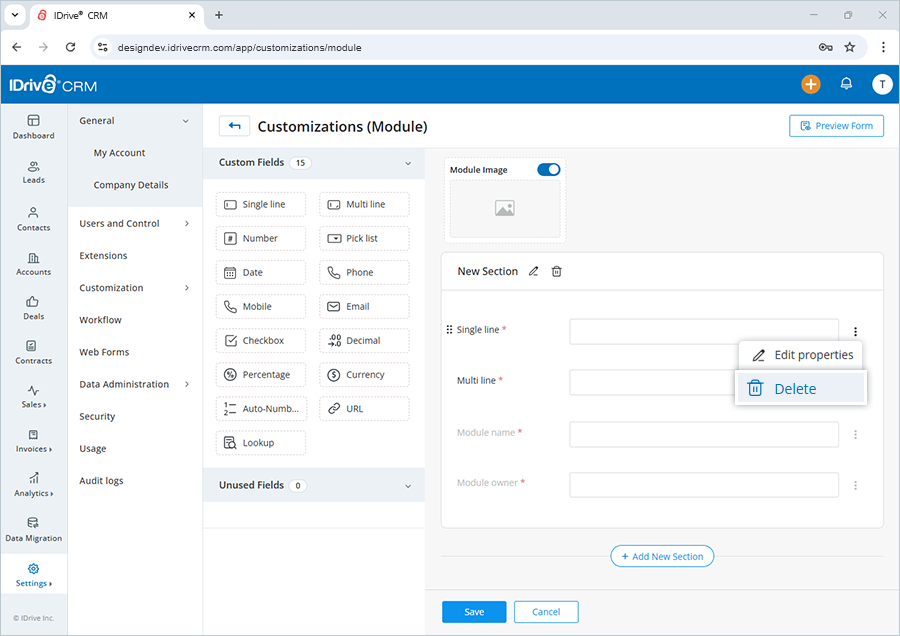
- Click
 corresponding to the field you want to edit.
 - Click Edit properties.
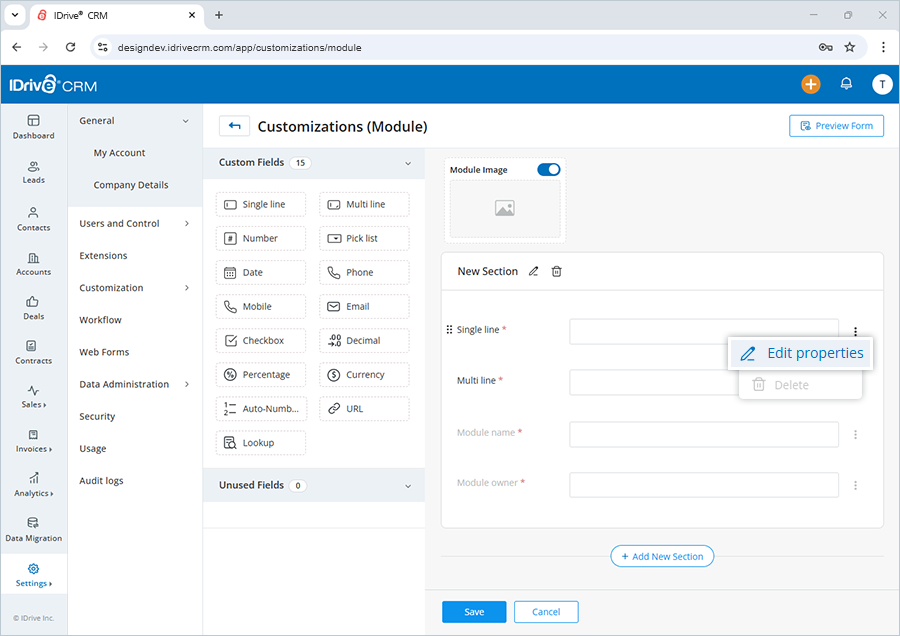
- Modify the details as required.
Note: For optional fields, select the checkboxes as required to make the field mandatory or hide from view. - Click Save to save the changes.
A success message will appear once the field is updated.
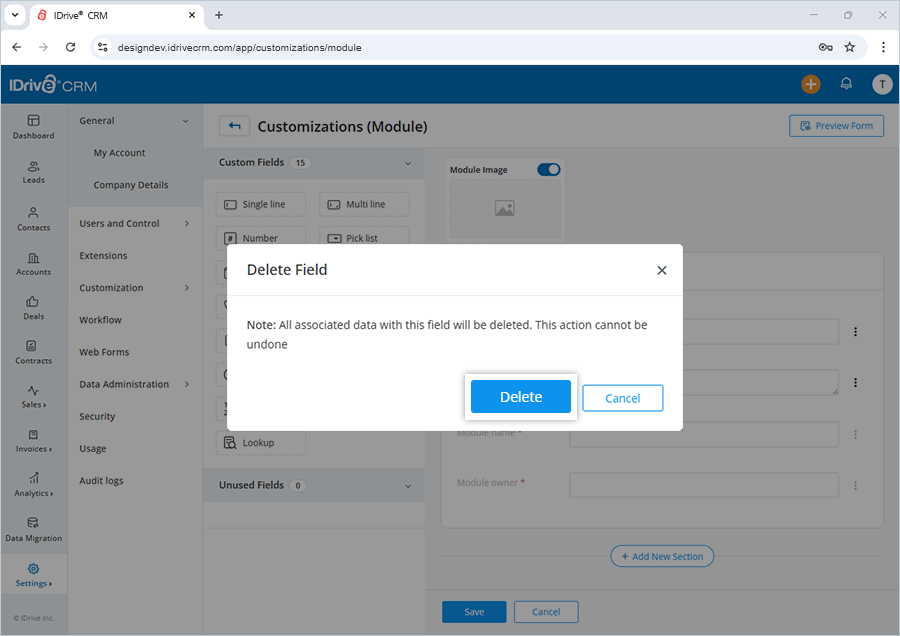
Yes, you can delete custom fields anytime. However, mandatory custom fields cannot be deleted.
To delete a custom field,
- Sign in to your IDrive® CRM account.
- Navigate to Settings and click Modules and Fields under Customization.
- Click the module for which you want to edit fields.
- Click Customize. The Customizations screen will open.
- Click corresponding to the custom field you want to delete.
- Click Delete.
To create a custom pipeline,
- Sign in to your IDrive® CRM account.
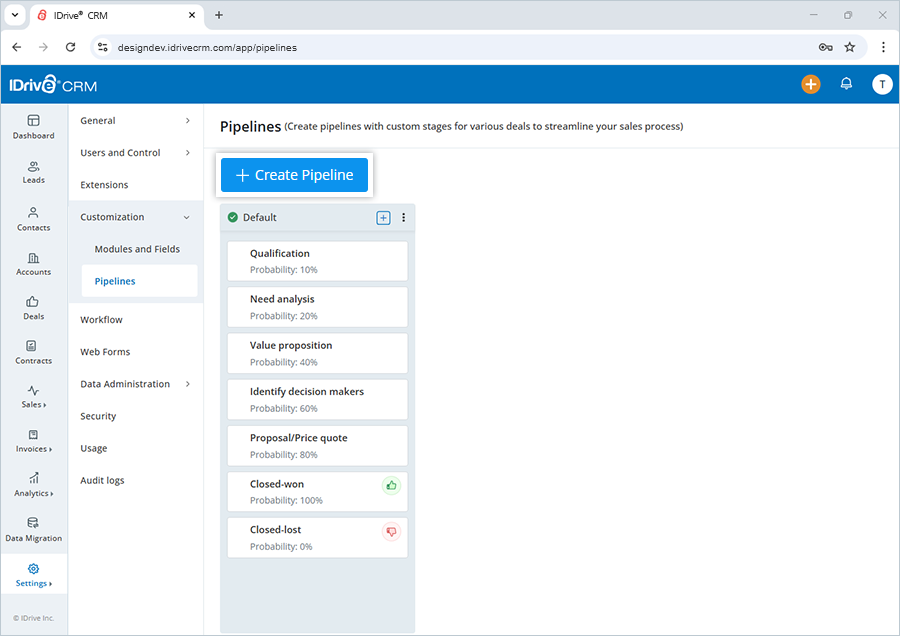
- Navigate to Settings and click Pipelines under Customization.
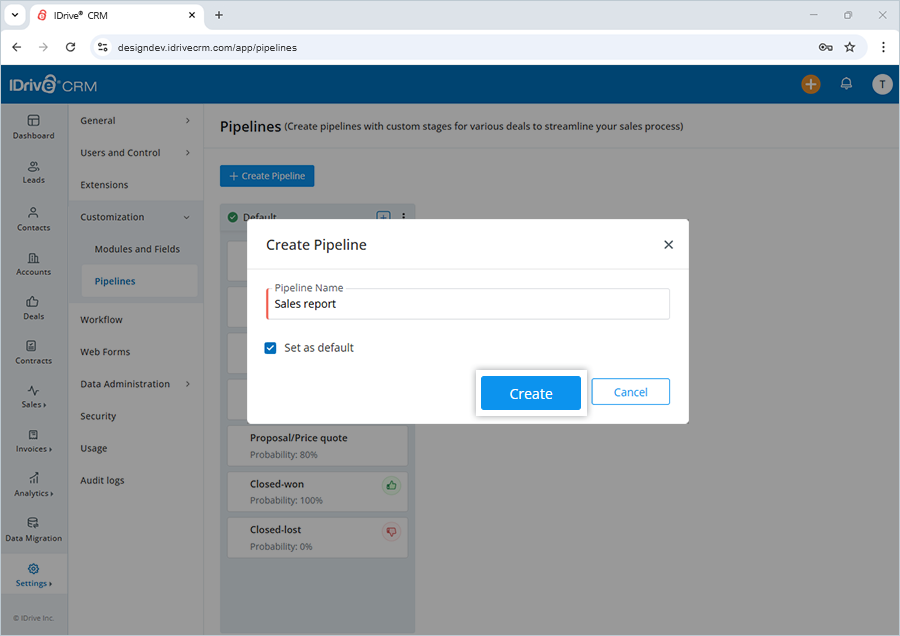
- Click Create Pipeline. A popup screen will appear.
- Enter the name of the pipeline.
- Click the Set as default checkbox if you want to make the newly created pipeline the default.
- Click Create. The Add/Remove Stage slider screen will appear.
- Under Deal stages, enter the Stage Name, Probability (%), and Stage Type.
- Click Add Stage if you want to add more stages to the pipeline.
- Click Done.
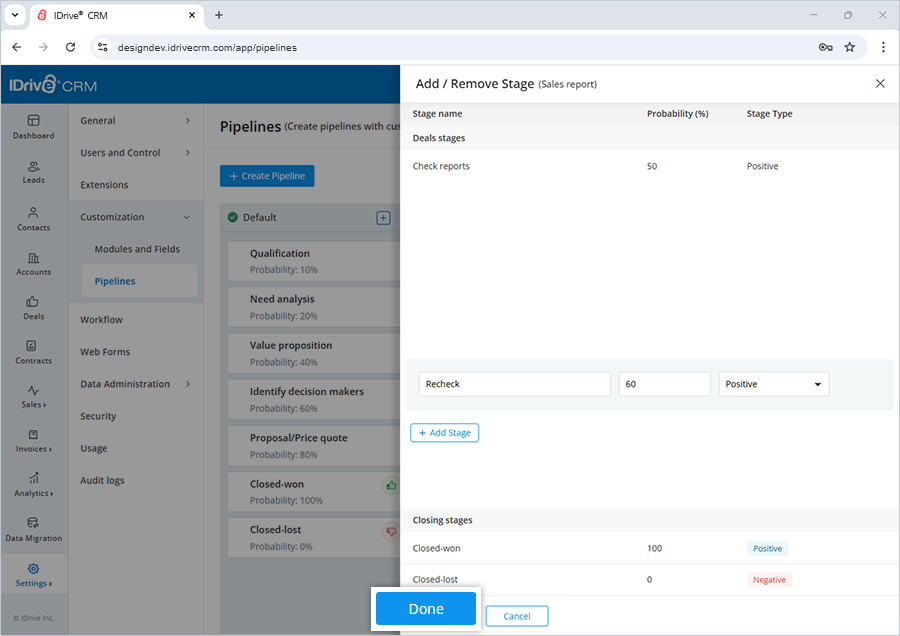
The pipeline will be added under Pipelines in the Customization tab and will appear in Kanban view.
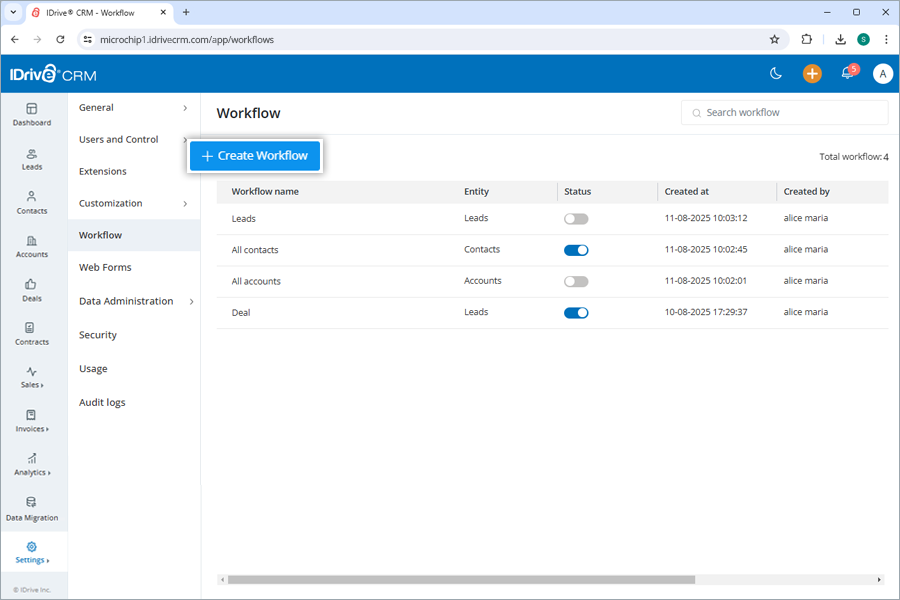
Users can create Workflow rules in IDrive® CRM to execute a certain set of actions (email notifications, and tasks) when certain specified conditions are met. These rules help by automating the process of sending emails, and assigning tasks when a rule is triggered.
To create a workflow,
- Sign in to your IDrive® CRM account.
- Navigate to Settings and click Workflow.
- Click Create Workflow.
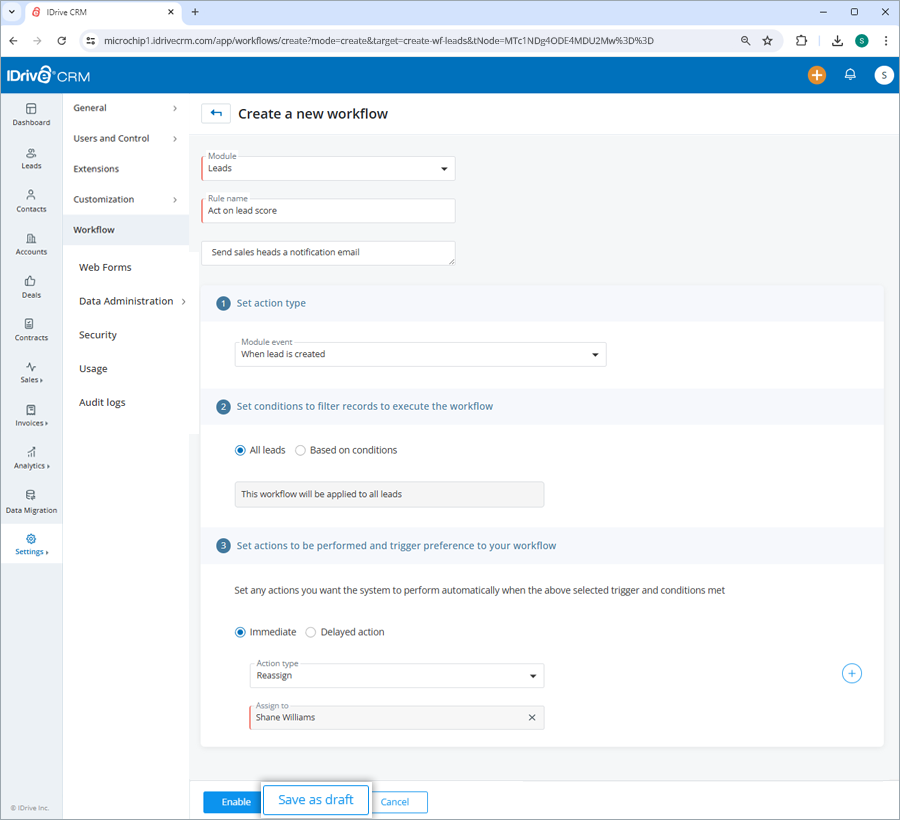
- Select the required module from the dropdown menu.
- Enter a Rule name.
- Provide a description for the workflow.
- Select an action for your workflow from Module event dropdown under Set action type.
- Under Set conditions to filter records to execute the workflow, choose to apply the workflow to all the records in the module, or configure conditions to filter the records for executing the workflow.
- Under Set actions to be performed and trigger preference to your workflow, select an immediate or delayed action to be performed automatically when the triggers and conditions chosen above are met.
- Select an action type:
- Reassign: On selecting Reassign, choose an assignee whom you wish to reassign.
- Webhook: On selecting Webhook, choose the Request Type and Protocol. Enter the URL. Enable Requires Authentication. Select an authentication method. You can either use an API key or username and password for authentication. Enable Add Custom Header, then enter the header details in the Custom Headers (JSON) field in JSON format.
- Send Email: On selecting Send Email, add the email addresses to share the workflow under Details of recipients. Choose a default email template or create a new one by clicking Create new template. Enter the subject and compose the email.
Note:
- Select the Notify reassigned owner via email checkbox to send an email notification to the new owner when a record is reassigned.
- Click Properties to autofill from dropdown options. These change as per the module selected when creating a workflow.
- Choose an assignee whom you wish to assign.
- Select an action type:
- Click
 to add more sets of rules.
 - Click
 to delete rules.
 - Click Configure to configure email services.
- Click Enable to create the workflow. On successful creation of the workflow, it will be listed on the Workflow page.

- Alternatively, click Save as Draft if you want to save the workflow as a draft for future use.
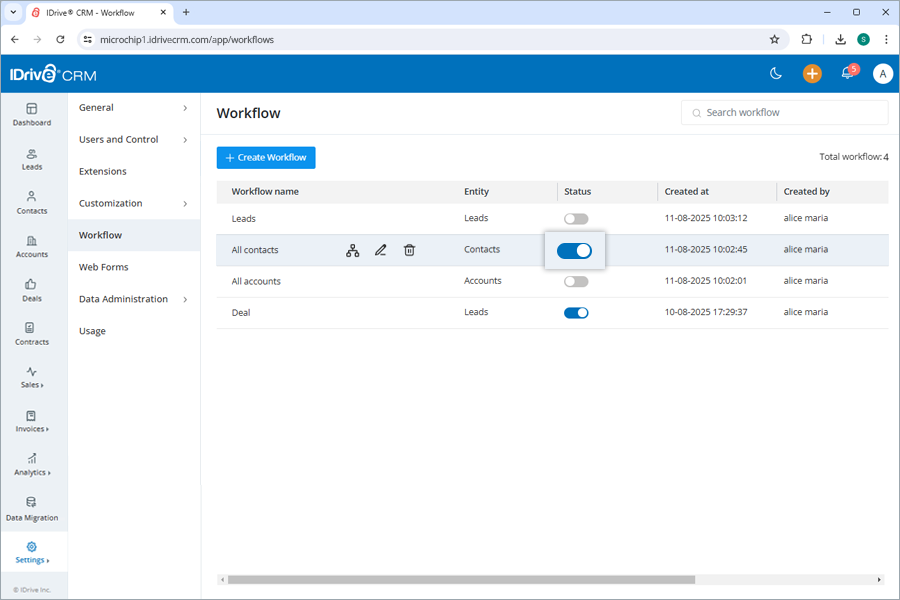
To disable a workflow,
- Sign in to your IDrive® CRM account.
- Navigate to Settings and click Workflow.
- Click the Enable/Disable workflow toggle button under Status for the workflow that you want to disable.
- Click Disable in the confirmation popup.
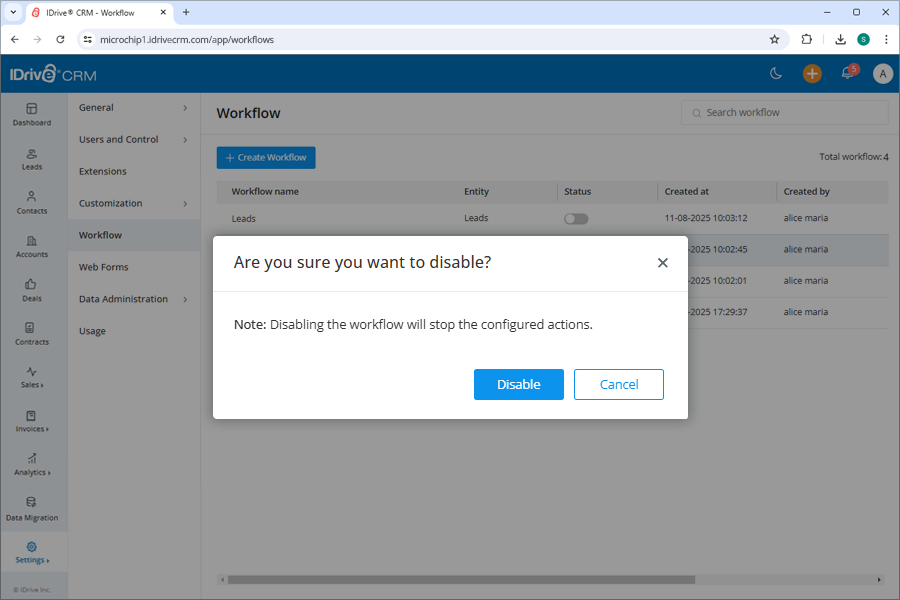
Disabling the workflow will stop the configured actions. You can enable a disabled workflow anytime by clicking the Enable/Disable workflow toggle button.
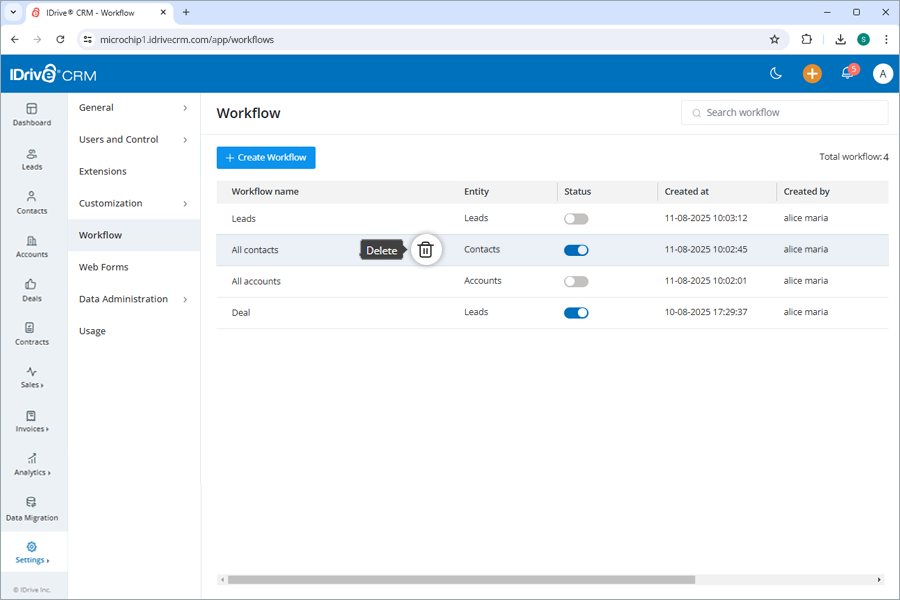
To delete a workflow,
- Sign in to your IDrive® CRM account.
- Navigate to Settings and click Workflow.
- Hover over the workflow that you want to delete.
- Click .
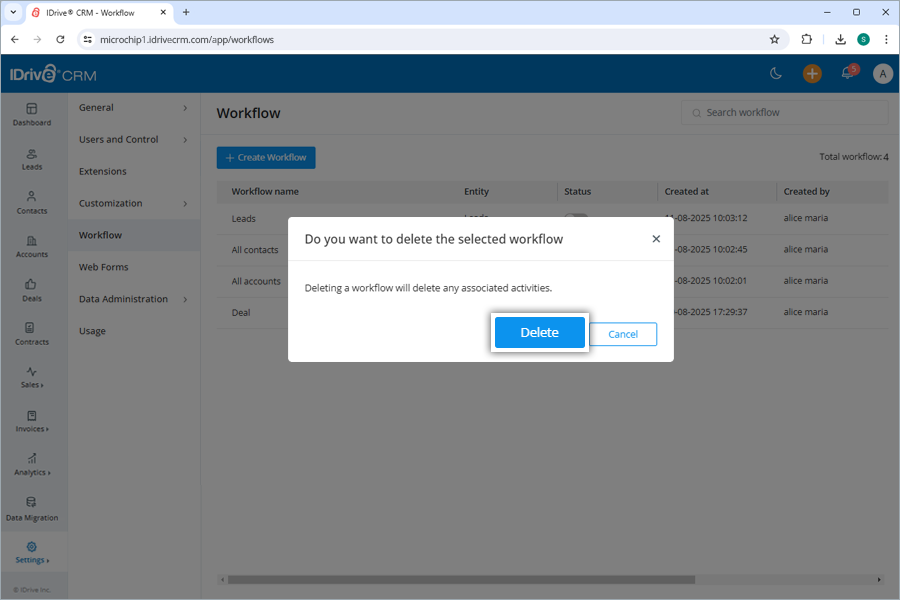
- Click Delete in the confirmation popup.
To create a form,
- Sign in to your IDrive® CRM account.
- Navigate to Settings and click Web Forms.
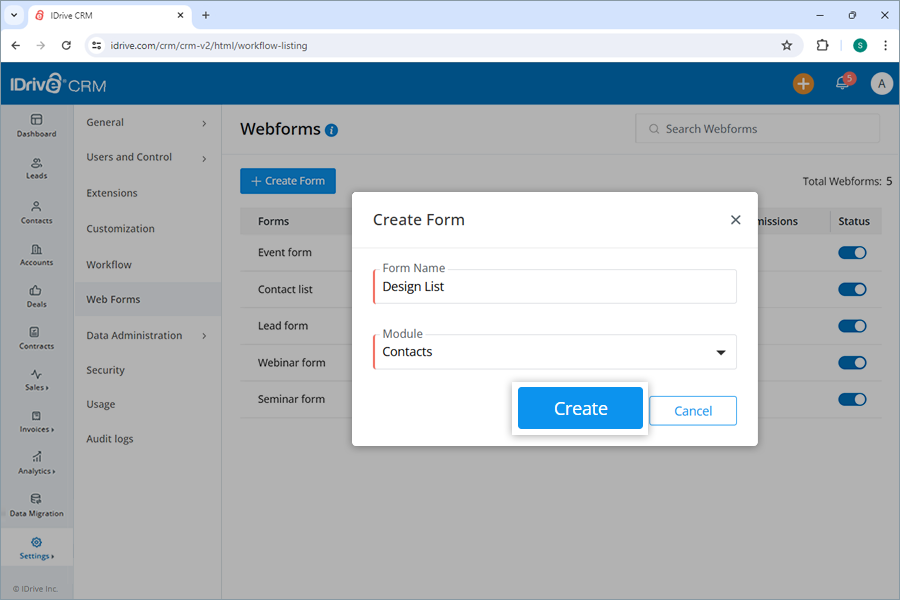
- Click Create Form.
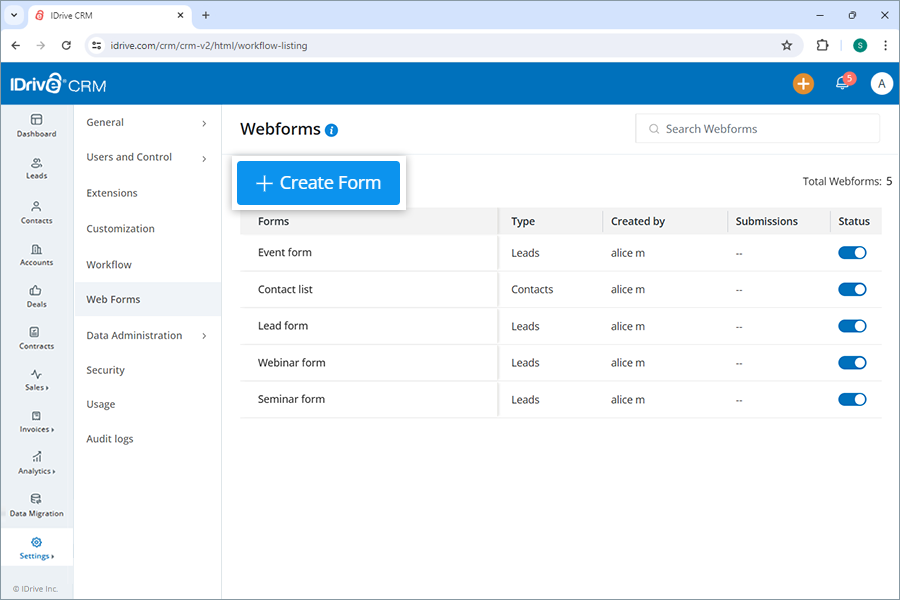
- Enter a Form name.
- Select the required module from the dropdown menu.
- Click Create to add a new form.
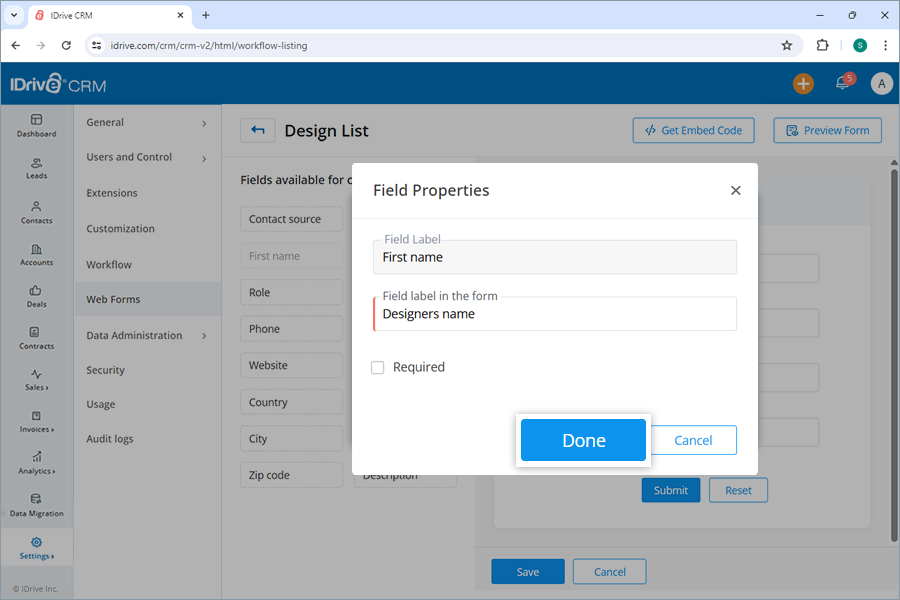
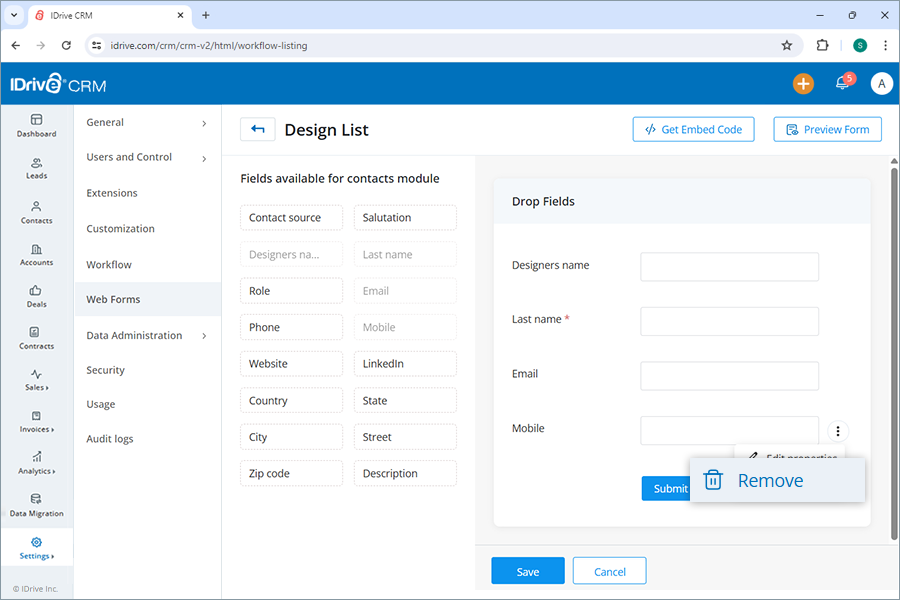
The fields available for the selected module like first name, last name, role, email, phone, mobile, country, state, city, pin/zip code, street, industry, note, etc. will be displayed. - Drag and drop the fields that you want to add to the form.
- Click corresponding to the required field.
- Select Edit properties.
The Field properties screen will appear. - Enter the details as per the form that you want to create like Field label, and Field label in the form.
- Select the Required check box.
- Click Done to proceed.
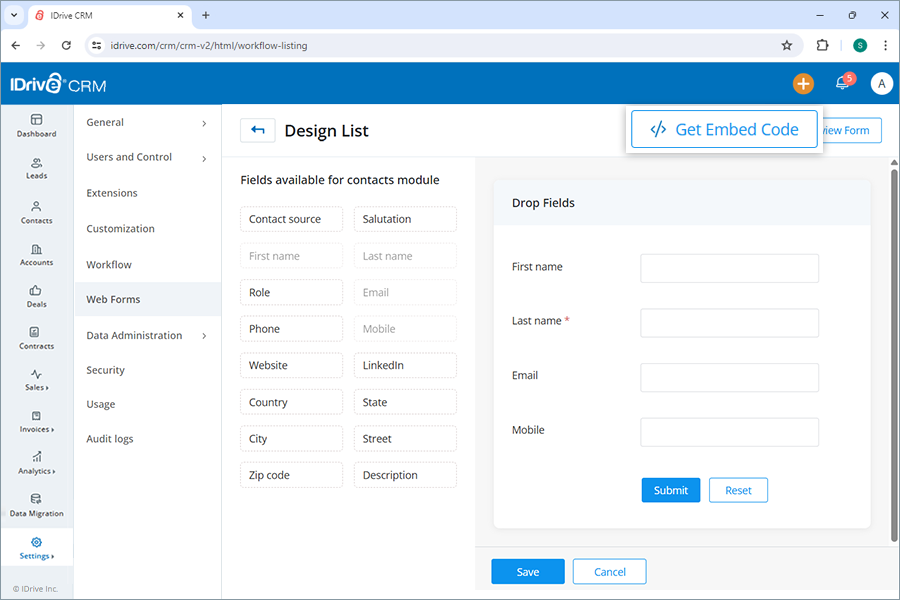
- Click Submit.
- Click Get Embed Code to get the HTML iframe tag to be embedded in your website.
- Click Preview Form if you want a preview of the form created.
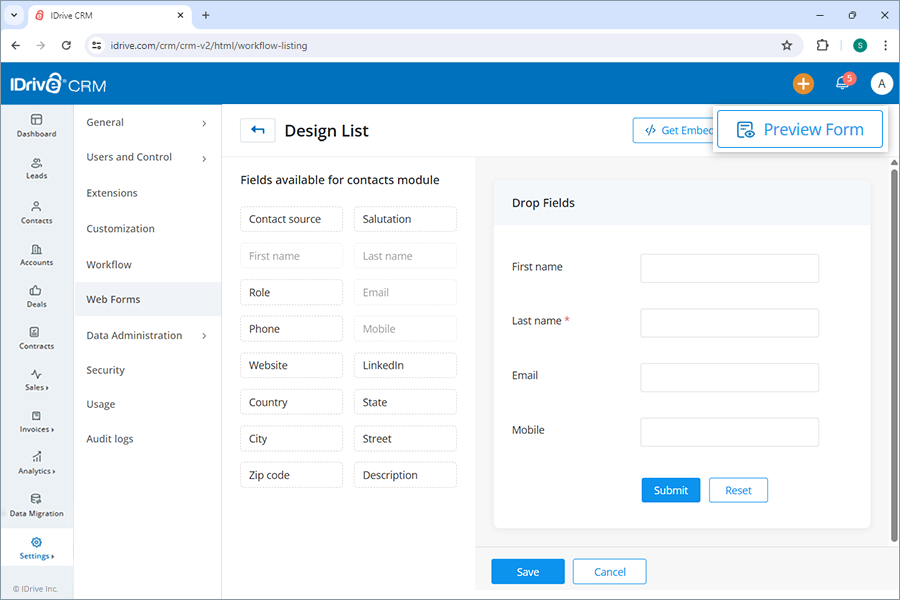
- Click Save to save the form.
On successful creation of the form, it will be listed on the Web Forms page along with its name, type, created by, submissions, and status. Hover over the form and select ![]() to view the form.
to view the form.
To get embed code,
- Sign in to your IDrive® CRM account.
- Navigate to Settings and click Web Forms..
- Hover over the form you want to edit and click .
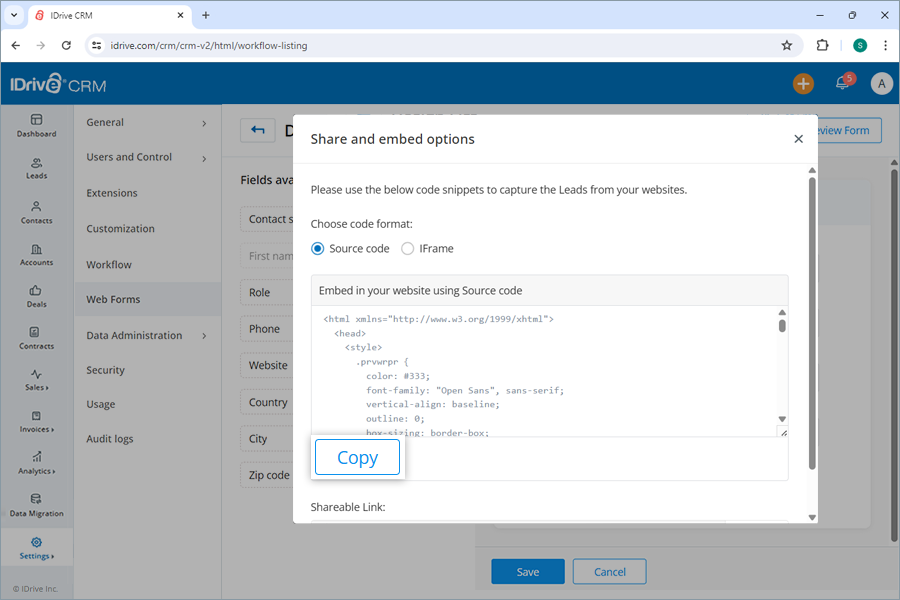
The edit screen will open. - Click Get Embed Code.
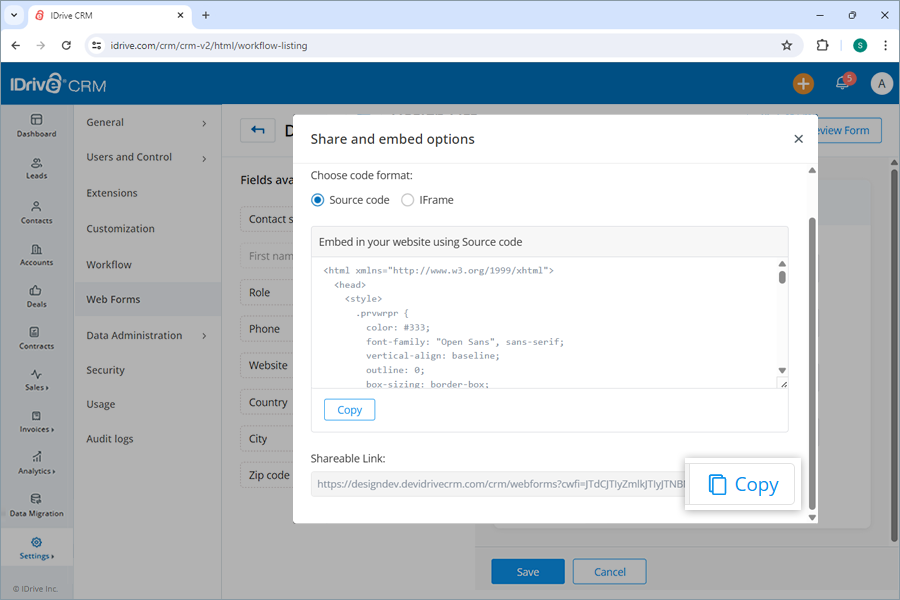
- Choose Source code or IFrame format.
- Click Copy to copy the code snippets to embed in your website.
If you want to share a link with intended recipients copy the link given under Shareable link.
Yes, you can edit a web form field anytime after it is created.
To edit a field,
- Sign in to your IDrive® CRM account.
- Navigate to Settings and click Web Forms.
- Hover over the form you want to edit and click .
The edit screen will open.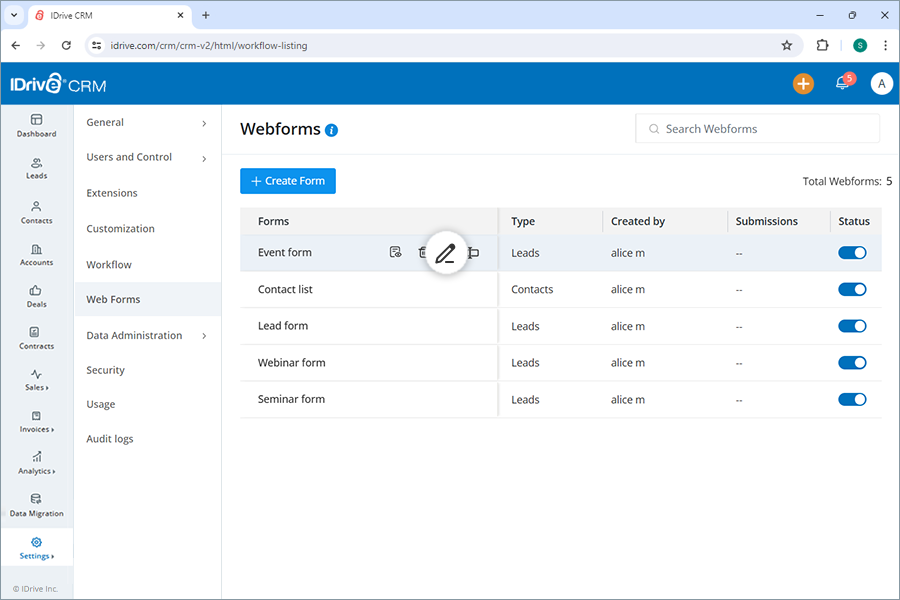
- Click corresponding to the field you want to edit.
- Click Edit properties.

- Modify the details as required.
- Click Done to save the changes.
A success message will appear once the field is updated. Click Save to save the changes done to the field.
To delete a field,
- Sign in to your IDrive® CRM account.
- Navigate to Settings and click Web Forms.
- Hover over the form you want to edit and click
 .
.
The edit screen will open. - Click corresponding to the field you want to delete.
- Click Remove.
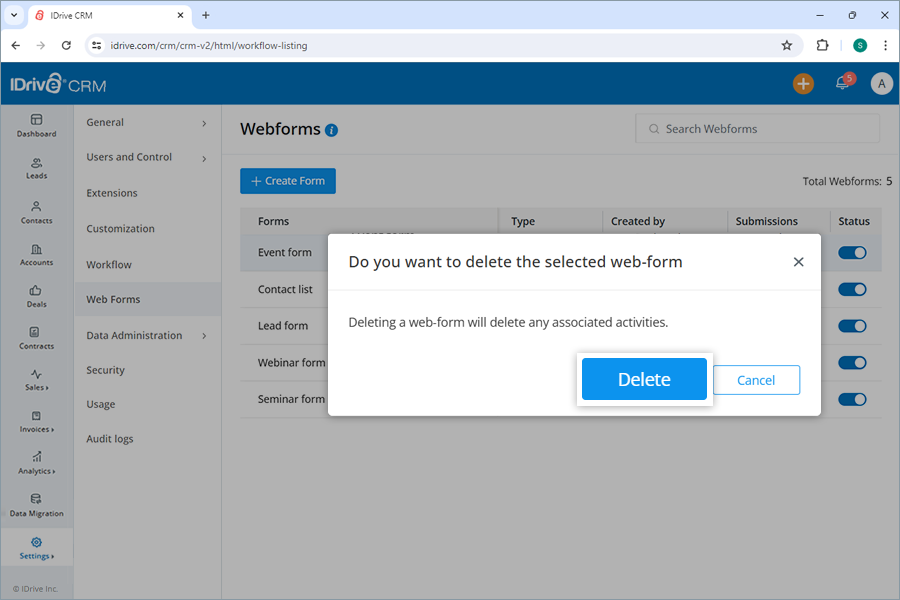
To delete a form,
- Sign in to your IDrive® CRM account.
- Navigate to Settings and click Web Forms.
- Hover over the form you want to delete and click .

- Click Delete in the confirmation popup.
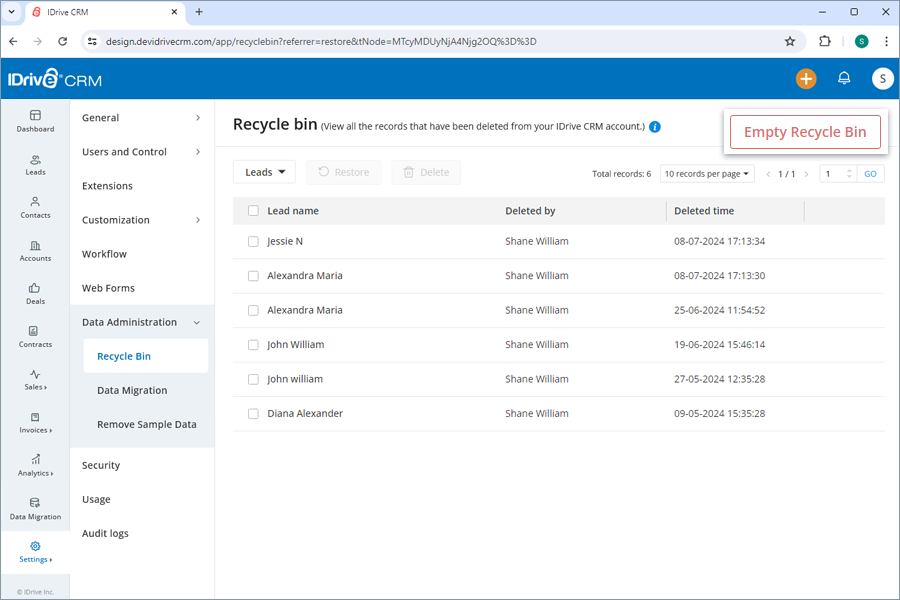
Yes, the records that are deleted from your IDrive® CRM account will be retained in the Recycle Bin for 60 days before they are permanently deleted. Admins and users with admin rights can restore the deleted records of any user from the Recycle Bin. However, non-admin users can only restore their own records.
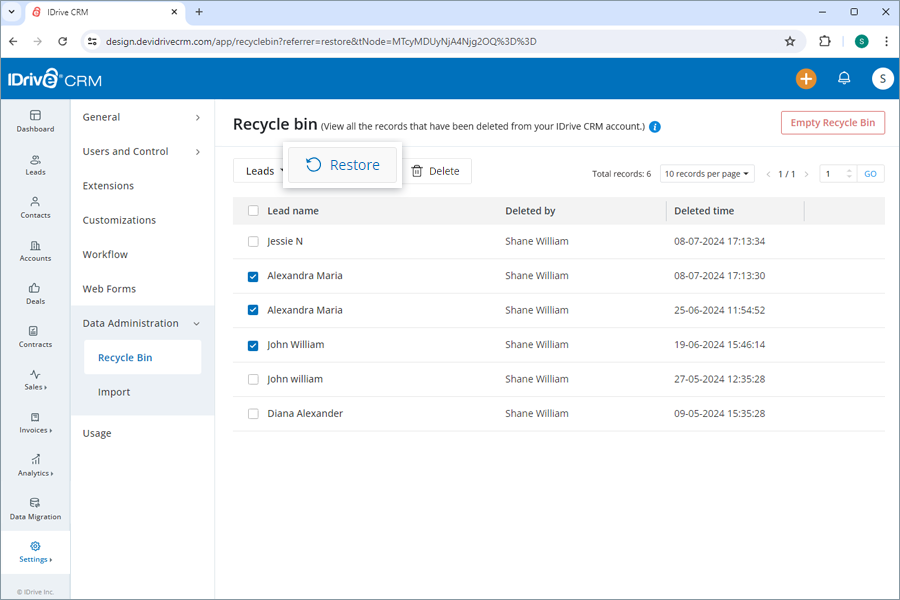
To restore deleted records,
- Sign in to your IDrive® CRM account.
- Navigate to Settings and click Data Administration.
- Click Recycle Bin.
- Select the required module from the dropdown list.
- Select the records that you want to restore.
- Click
 .
.
To permanently delete records from recycle bin,
- Sign in to your IDrive® CRM account.
- Navigate to Settings and click Data Administration.
- Click Recycle Bin.
- Click Empty Recycle Bin to delete all the records.
- Click Delete in the confirmation popup to remove all records.
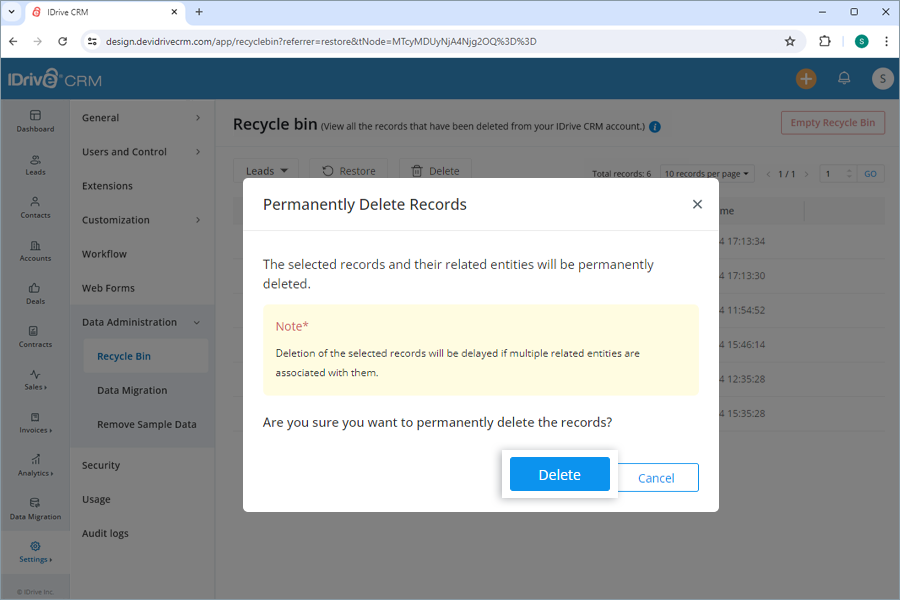
To delete individual records from recycle bin,
- Select the required module from the dropdown list.
- Click .
- Click Delete in the confirmation popup to remove the selected record.
To delete sample data,
- Sign in to your IDrive® CRM account.
- Navigate to Settings and click Data Administration.
- Click Remove Sample Data.
- Click Remove.
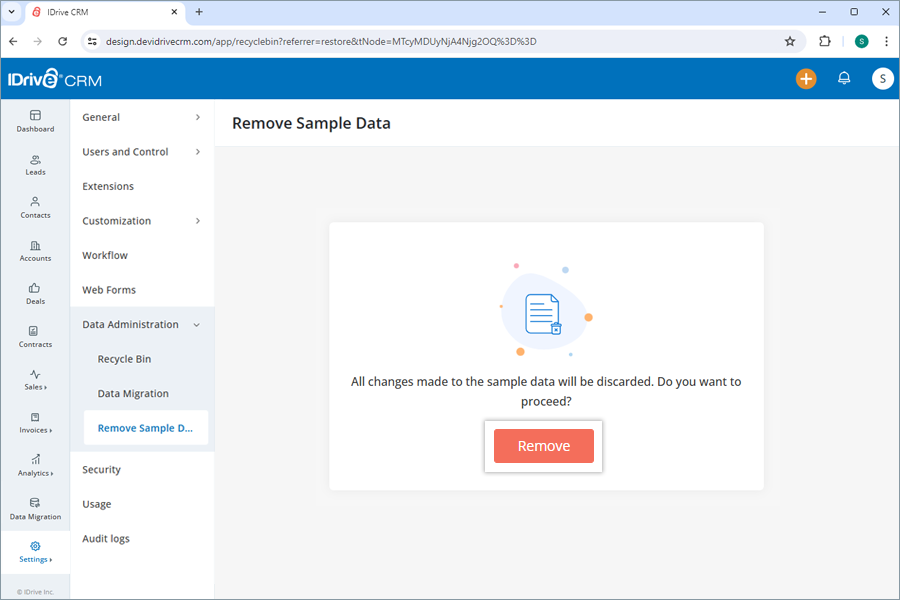
All changes made to the sample data in your account will be discarded.
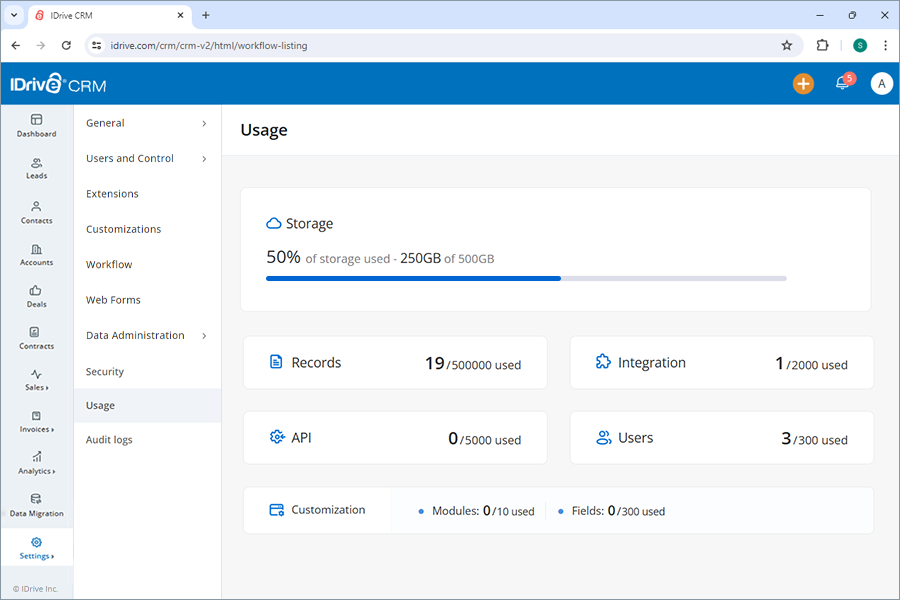
Sign in to your IDrive® CRM account, navigate to Settings and click Usage. An overview of the total storage used, records entered, APIs, integrations utilized, total number of users and customized modules and fields will be displayed.
Yes, you can view the Audit Logs to keep track of all actions performed by users in your account. This allows you to monitor changes, updates, and activities across the account.
To view the audit logs,
- Sign in to your IDrive® CRM account.
- Navigate to Settings and click Audit Logs.
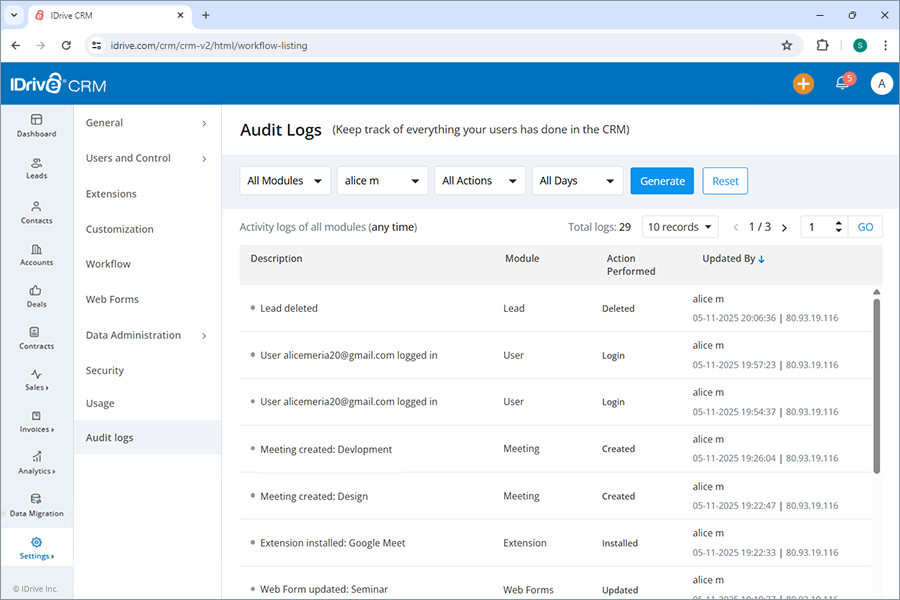
- Select the desired parameters, such as module, user, action, and time range from the respective dropdown lists.
- Click Generate.
The audit logs for the specified module, user, action, and time range will be displayed.