- Developer's Guide
- Endpoints and Access Keys
- Third-Party Tools
- Veeam®
- Veeam® 12 Direct-to-Cloud
- MSP360
- MSP360 Cloudberry
- MSP360 CloudBerry Explorer
- MSP360 Managed Backup Service
- Ahsay
- Acronis Cyber Protect Cloud
- Anchorpoint
- AirLiveDrive
- Archiware P5
- Arcserve
- Arcserve ImageManager
- Arq Backup
- BackupAssist
- Bunny.net
- ChronoSync
- Cohesity
- Cloudmounter
- Cloudflare
- Comet
- Couchbase
- cPanel Backup
- CrossFTP
- CuttingRoom
- CubeBackup
- Cyberduck
- Dell
- Dropshare
- Duplicacy
- Duplicati
- EditShare
- ExpanDrive
- Fastly CDN
- Files.com
- Filezilla Pro
- Flexify.IO
- GoodSync
- Hammerspace
- Hedge OffShoot
- Hitachi Content Platform
- iconik
- Iperius Backup
- iRODS
- Jet Backup5
- LucidLink
- Milestone XProtect
- Mountain Duck
- MultCloud
- /n software S3 Drive
- NAKIVO Backup and Replication
- Nextcloud
- NirvaShare
- NovaBACKUP
- odrive
- Photos+ Cloud Library
- PureStorage
- qBackup
- QNAP
- Quest Rapid Recovery
- Rclone
- Restic
- Retrospect
- S3 Browser
- S3cmd
- S3Drive
- s5cmd
- S3FS
- SFTPCloud
- SimpleBackups
- Snowflake
- SyncBackPro
- Syncovery
- Synology Hyper Backup
- Synology Cloud Sync
- Transmit
- TrueNAS® CORE
- UpdraftPlus Backup
- Vantage Gateway
- Veeam® Backup for Microsoft 365
- Vembu BDR Suite
- Veritas Backup Exec
- WinSCP
- Windows Network Drive
- CNAME Record Guide
- API Documentation
How to Use Cohesity DataProtect with IDrive® e2
IDrive® e2 is a highly scalable, cloud object storage solution ideal for use with Cohesity DataProtect. This guide walks you through configuring IDrive® e2 as an external cloud destination on the Cohesity platform for archival.
Table of Contents
- Prerequisites
- Add IDrive® e2 as a Cloud Target in Cohesity
- Create a Protection Policy in Cohesity
- Backup Data to IDrive® e2
- How to Restore a Virtual Machine from Backup
1. Prerequisites
Before you begin, ensure you have the following:
- An active IDrive® e2 account. Sign up here if you do not have one.
- A bucket in IDrive® e2. how to create a bucket. While creating bucket, choose a region closest to your Cohesity cluster for better performance.
- Valid Access Key ID and Secret Access Key. Learn how to create an access key.
- A Cohesity cluster up and running.
2. Add IDrive® e2 as an External Target in Cohesity
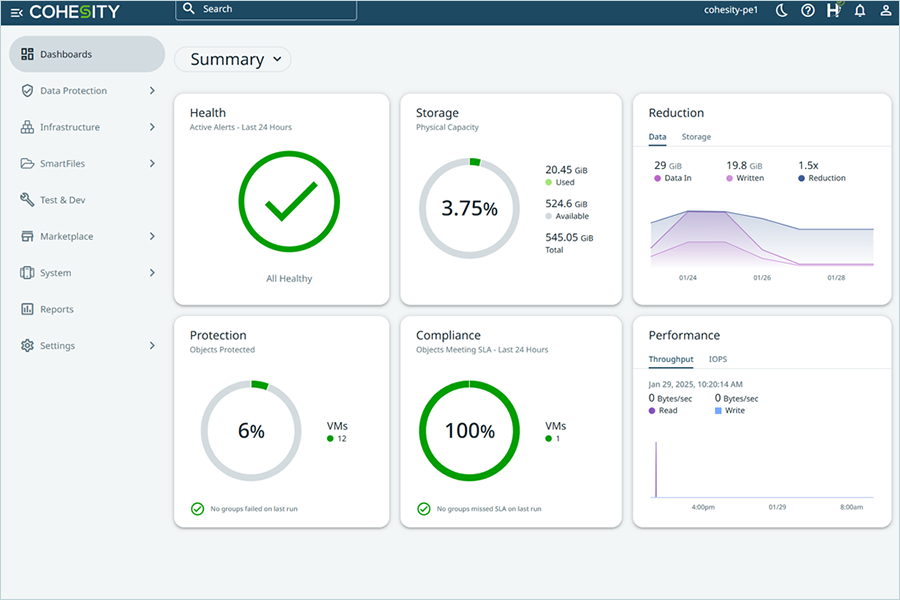
- Log in to your Cohesity Dashboard.
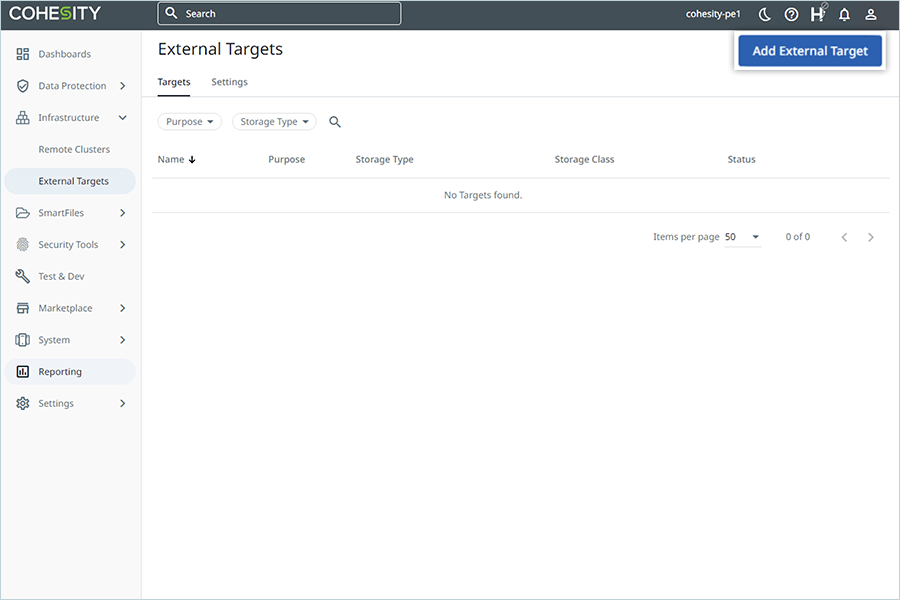
- Go to Infrastructure > External Targets.
- Click Add External Target.
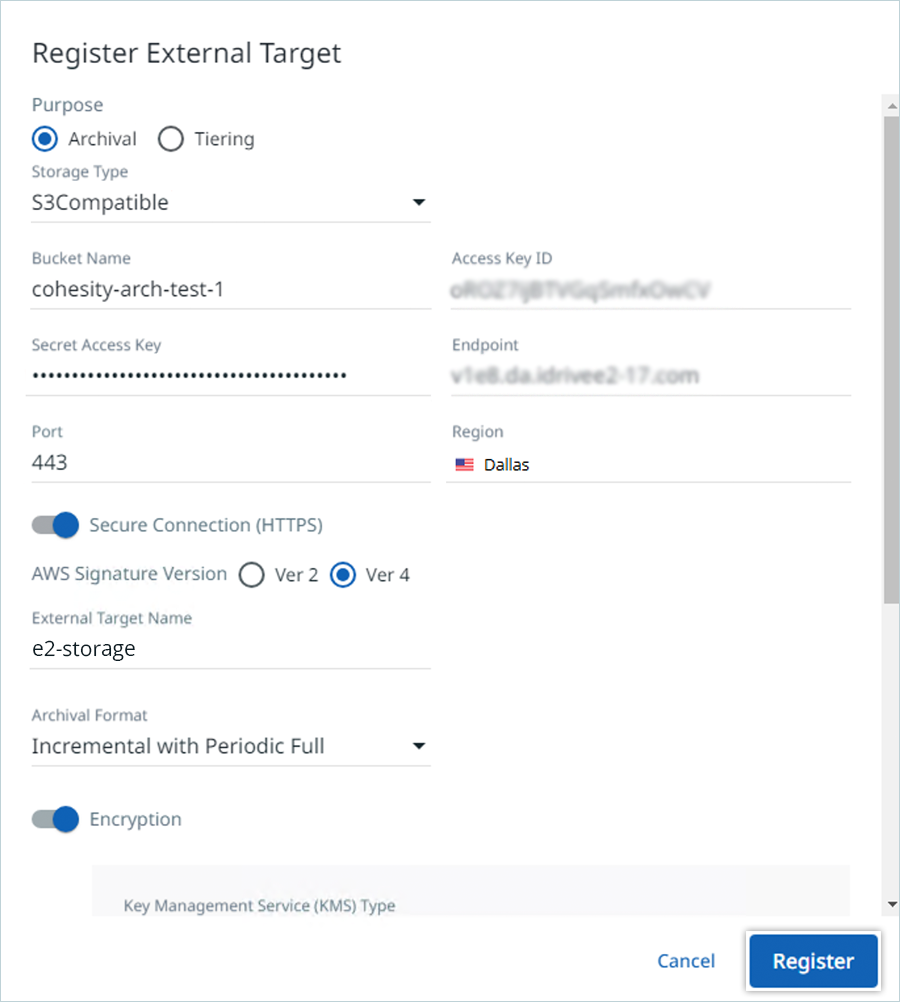
- In the Register External Target window, enter the following information:
- Purpose: Select Archival or Tiering. This guide uses an archival-type external target.
- Archival: is suitable for long-term data retention on low cost storage to meet compliance and retention requirements.
- Tiering: enables an additional storage tier where cold data can be stored.
- Type: Choose S3 Compatible as the target type.
- Bucket Name: Enter the name of the bucket created in IDrive® e2
- Access Key ID: Enter your IDrive® e2 access key
- Secret Access Key: Enter your IDrive® e2 secret key
- Endpoint: Use the endpoint URL for your IDrive e2 bucket region
- Region: Enter the region for your IDrive® e2 bucket
- Target name: Enter a name for the external target, e.g., e2-storage
- Archival Format: Use the default format Incremental with Periodic Full.
- Archive Object Lock: Enable this option if you want to use an object lock enabled IDrive® e2 bucket as your external target.
- Purpose: Select Archival or Tiering. This guide uses an archival-type external target.
- Click Register.
Cohesity will now validate and register IDrive® e2 as a cloud external target.
3. Create a Protection Policy in Cohesity
A protection policy defines how and when sources are protected and archived in Cohesity.
- Go to Data Protection > Policies.
- Click Create Policy.
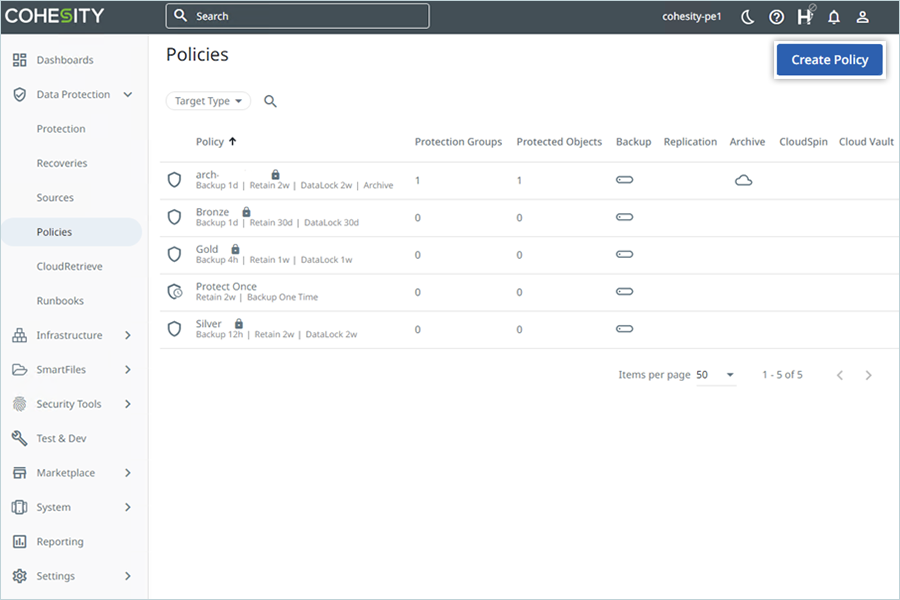
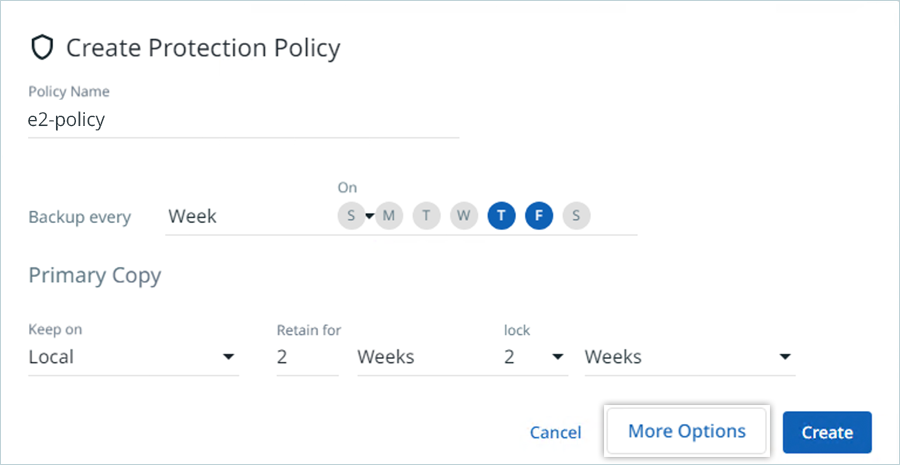
- Enter the Policy Name.
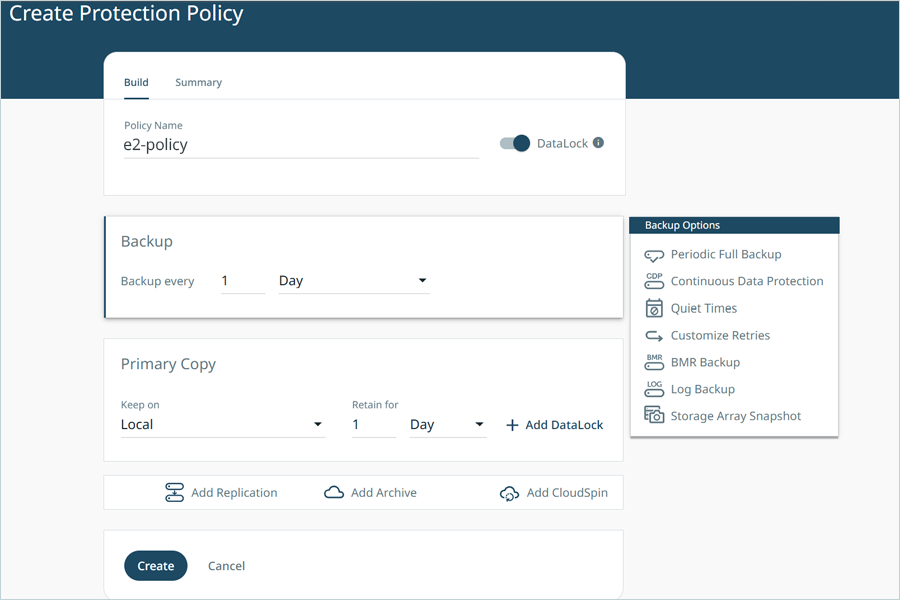
- Configure the schedule to run backups, and the retention period as required.
- Click More Options.
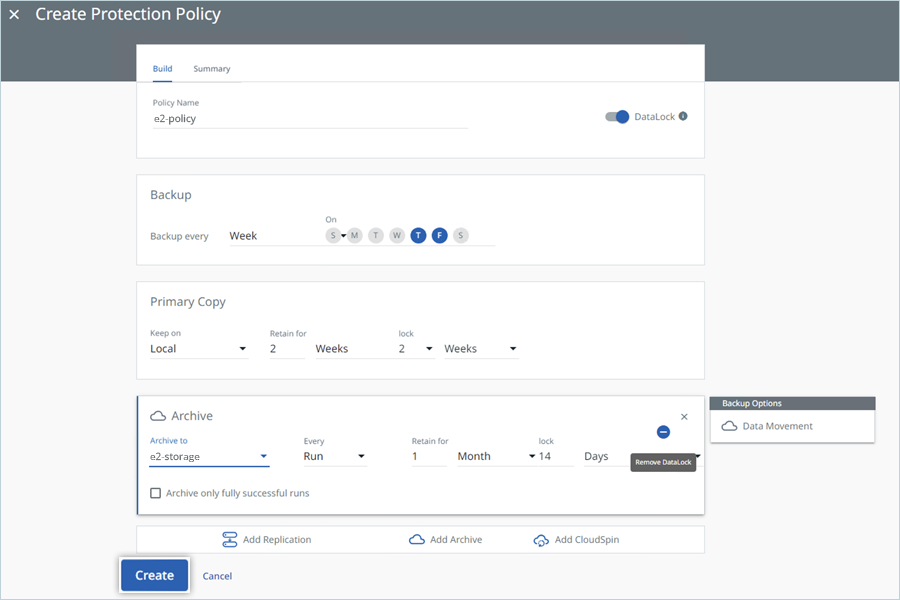
- Click Add Archive and under Archive to select the external target pointing to IDrive® e2.
- Set the retention period.
- Click Remove Datalock beside the lock period if your external target is an object lock enabled bucket.
- Specify how often you want the backup to run.
- Specify how long you want to keep the primary copy locally.
- Click Create.
4. Backup Data to IDrive® e2
This guide focuses on backing up virtual machines.
For instructions on protecting other data types, refer the official Cohesity documentation.
- Navigate to Data Protection, then click on Protection to access the Protection dashboard.
- Select Protect and choose Virtual Machines as your data source.
- Click on Add Objects to choose the virtual machines you want to back up.

- From the dropdown menu, select the appropriate Registered Source, then check the boxes next to the VMs you want to include in the backup.
Note: In this example, the VMs have already been discovered by Cohesity. If your environment requires it, please refer to Cohesity’s "Register a Hypervisor Source" guide. - If you'd like to group these VMs, enter a name to create a new Protection Group, then click on Policy.
- Choose the desired protection policy (created in an earlier step) from the dropdown, and then click Protect.
Once configured, your backup task will be listed on the Protection page. To start the backup immediately, click the three-dot menu next to the protection task and choose Run Now.

For backups to object lock enabled external targets,
- Once you register the target and select it in the protection policy, you will see the prompt about the External Target being Archive Object Lock enabled. The data will be locked for as long as you specify the retention period to be and cannot be deleted until then.
- Once the backup job is complete you can go to the protection job and view details. You can now see the Object Lock expiry details on when the backups will be deleted.
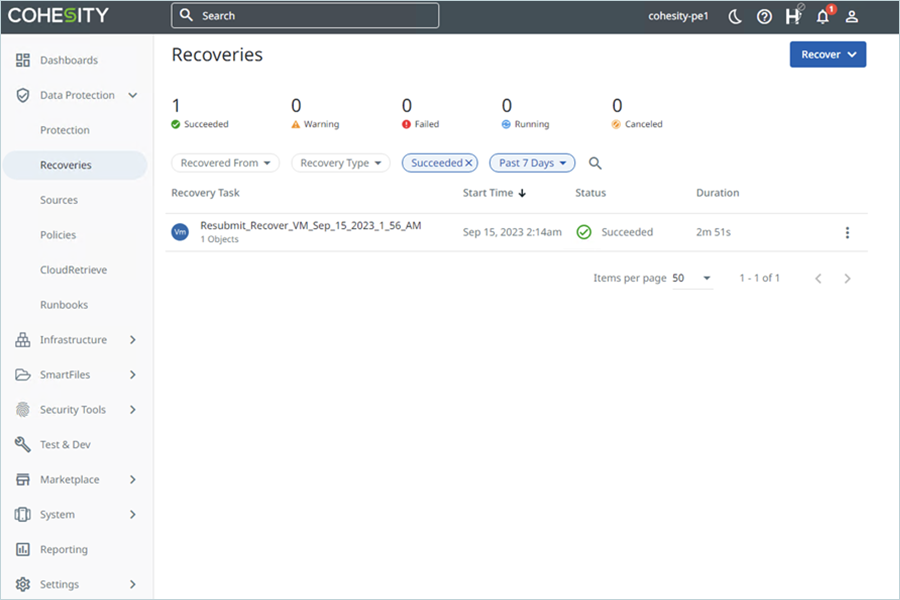
5. How to Restore a Virtual Machine from Backup
This walkthrough explains how to recover a virtual machine from a previously created backup:
- Go to Data Protection and click on Recoveries to open the recovery panel.
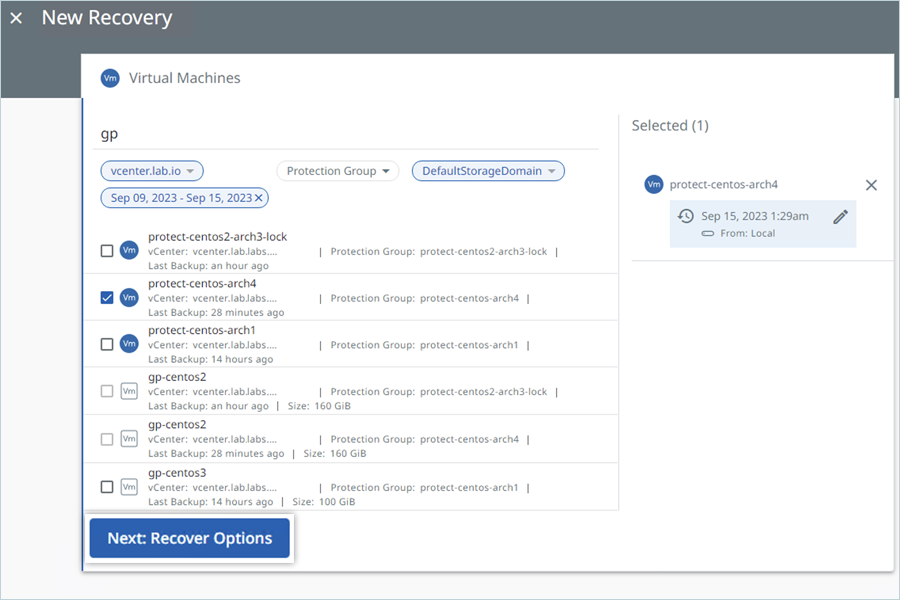
- Click on Recover, then select Virtual Machines > VMs to start the recovery process. Note: For other recovery scenarios, check Cohesity's documentation.
- In the Virtual Machines window, you can search for a specific VM by name or enter an asterisk (*) to list all available backed-up VMs. Select the VM(s) you wish to recover by checking the appropriate boxes.
- Click Next: Recover Options to proceed.
- Choose your recovery settings:
- Recovery Destination: Select the location where the VM will be restored.
- Recovery Method: Choose how the VM should be restored.
- Existing VM Handling: Specify how to handle existing VMs with the same name.
- Click Recover to initiate the restoration.
You can choose from two recovery options:
- Recover to Original Location – Restore VM files (e.g., VMDK) to their original datastore and create a new instance in the original resource pool.
- Recover to New Location – Restore VM files to a different datastore and create a new VM instance in another resource pool of a registered source.
You can track the progress of the recovery operation directly from the Recoveries page.